
Crochet Fursuit Paws
Designed by Limette Minztee.
This pattern uses US terminology. The pattern is aimed at intermediate crocheters. It assumes that you are familiar with the stitches used and know how to read written patterns.
If the gloves don’t fit your hands, you can try using a different hook size or yarn weight.
Materials
- 6.5 mm and 6.0 mm hooks
- any DK yarn – for my pair I used Schachenmayr Bravo
- yarn tapestry needle
- stitch markers (optional)
(Alternatively, you could use a heavier yarn weight than DK to crochet with a single strand, but I'm not sure which yarn weight would be ideal. I chose double-stranded DK because it is affordable and has a wide range of colors.)
I used acrylic yarn as it is cheap, accessible and machine-washable.
Abbreviation Guide
- ch = chain
- hdc = half-double crochet
- dc = double crochet
- sl St = slip stitch
- inc = increase
- dec = decrease
- sts = stitches
Glove Panels (make 2)
Use a 6.5 mm hook and double stranded yarn in the color of your choice.
Row 1: ch12, starting from the third backbump of the chain, 9hdc, 3hdc in the last bump, 9hdc on the other side of the chain (21)
Row 2: ch1, turn, 9hdc, hdc inc in next 3sts, 9hdc (24)
Row 3: ch1, turn, 9hdc, dc inc, 1hdc, 2dc inc, 1hdc, dc inc, 9hdc (28)
Row 4: ch1, turn, 7hdc, 2dc, dc inc, 3dc, 2dc inc, 3dc, dc inc, 2dc, 7hdc (32)
Row 5: ch1, turn, 9hdc, 3dc in next stitch, 5dc, 2dc inc, 5dc, 3dc in next stitch, 9hdc (38)
Fasten off and leave a tail for sewing.
Now sew the sides of the panels together. There should be an 18 stitches long, open space on the wide end of the glove, where the fingers will be sewn onto, and another open space on the narrow end of the glove, to fit your hand into.
Middle Fingers (make 2)
Use a 6.5 mm hook and double stranded yarn in the color of your choice. As this is crocheted in the round, you can use a stitch marker to keep track of where you are.
Round 1: magic ring, 6hdc (6)
Round 2: (hdc inc, 2hdc) x2 (8)
Round 3: 3hdc, 2dc inc, 3hdc (10)
Round 4: 3hdc, 1dc, 2dc inc, 1dc, 3hdc (12)
Round 5-6: 12hdc (12)
Round 7: hdc dec, 8hdc, hdc dec (10)
Slip stitch and fasten off.
Thumb/Pinky Fingers (make 2)
Use a 6.5 mm hook and double stranded yarn in the color of your choice. As this is crocheted in the round, you can use a stitch marker to keep track of where you are.
Round 1: magic ring, 6hdc (6)
Round 2: (hdc inc, 2hdc) x2 (8)
Round 3: 3hdc, 2dc inc, 3hdc (10)
Round 4: 3hdc, 1dc, 2dc inc, 1dc, 3hdc (12)
Round 5: 12hdc (12)
Round 6: hdc dec, 8hdc, hdc dec (10)
Round 7: hdc dec, 2hdc, 2hdc inc, 2hdc, hdc dec (10)
Now sew the fingers into the 18 stitch wide space on your glove panels. Make sure they are spaced evenly, and that you can fit your fingers inside.
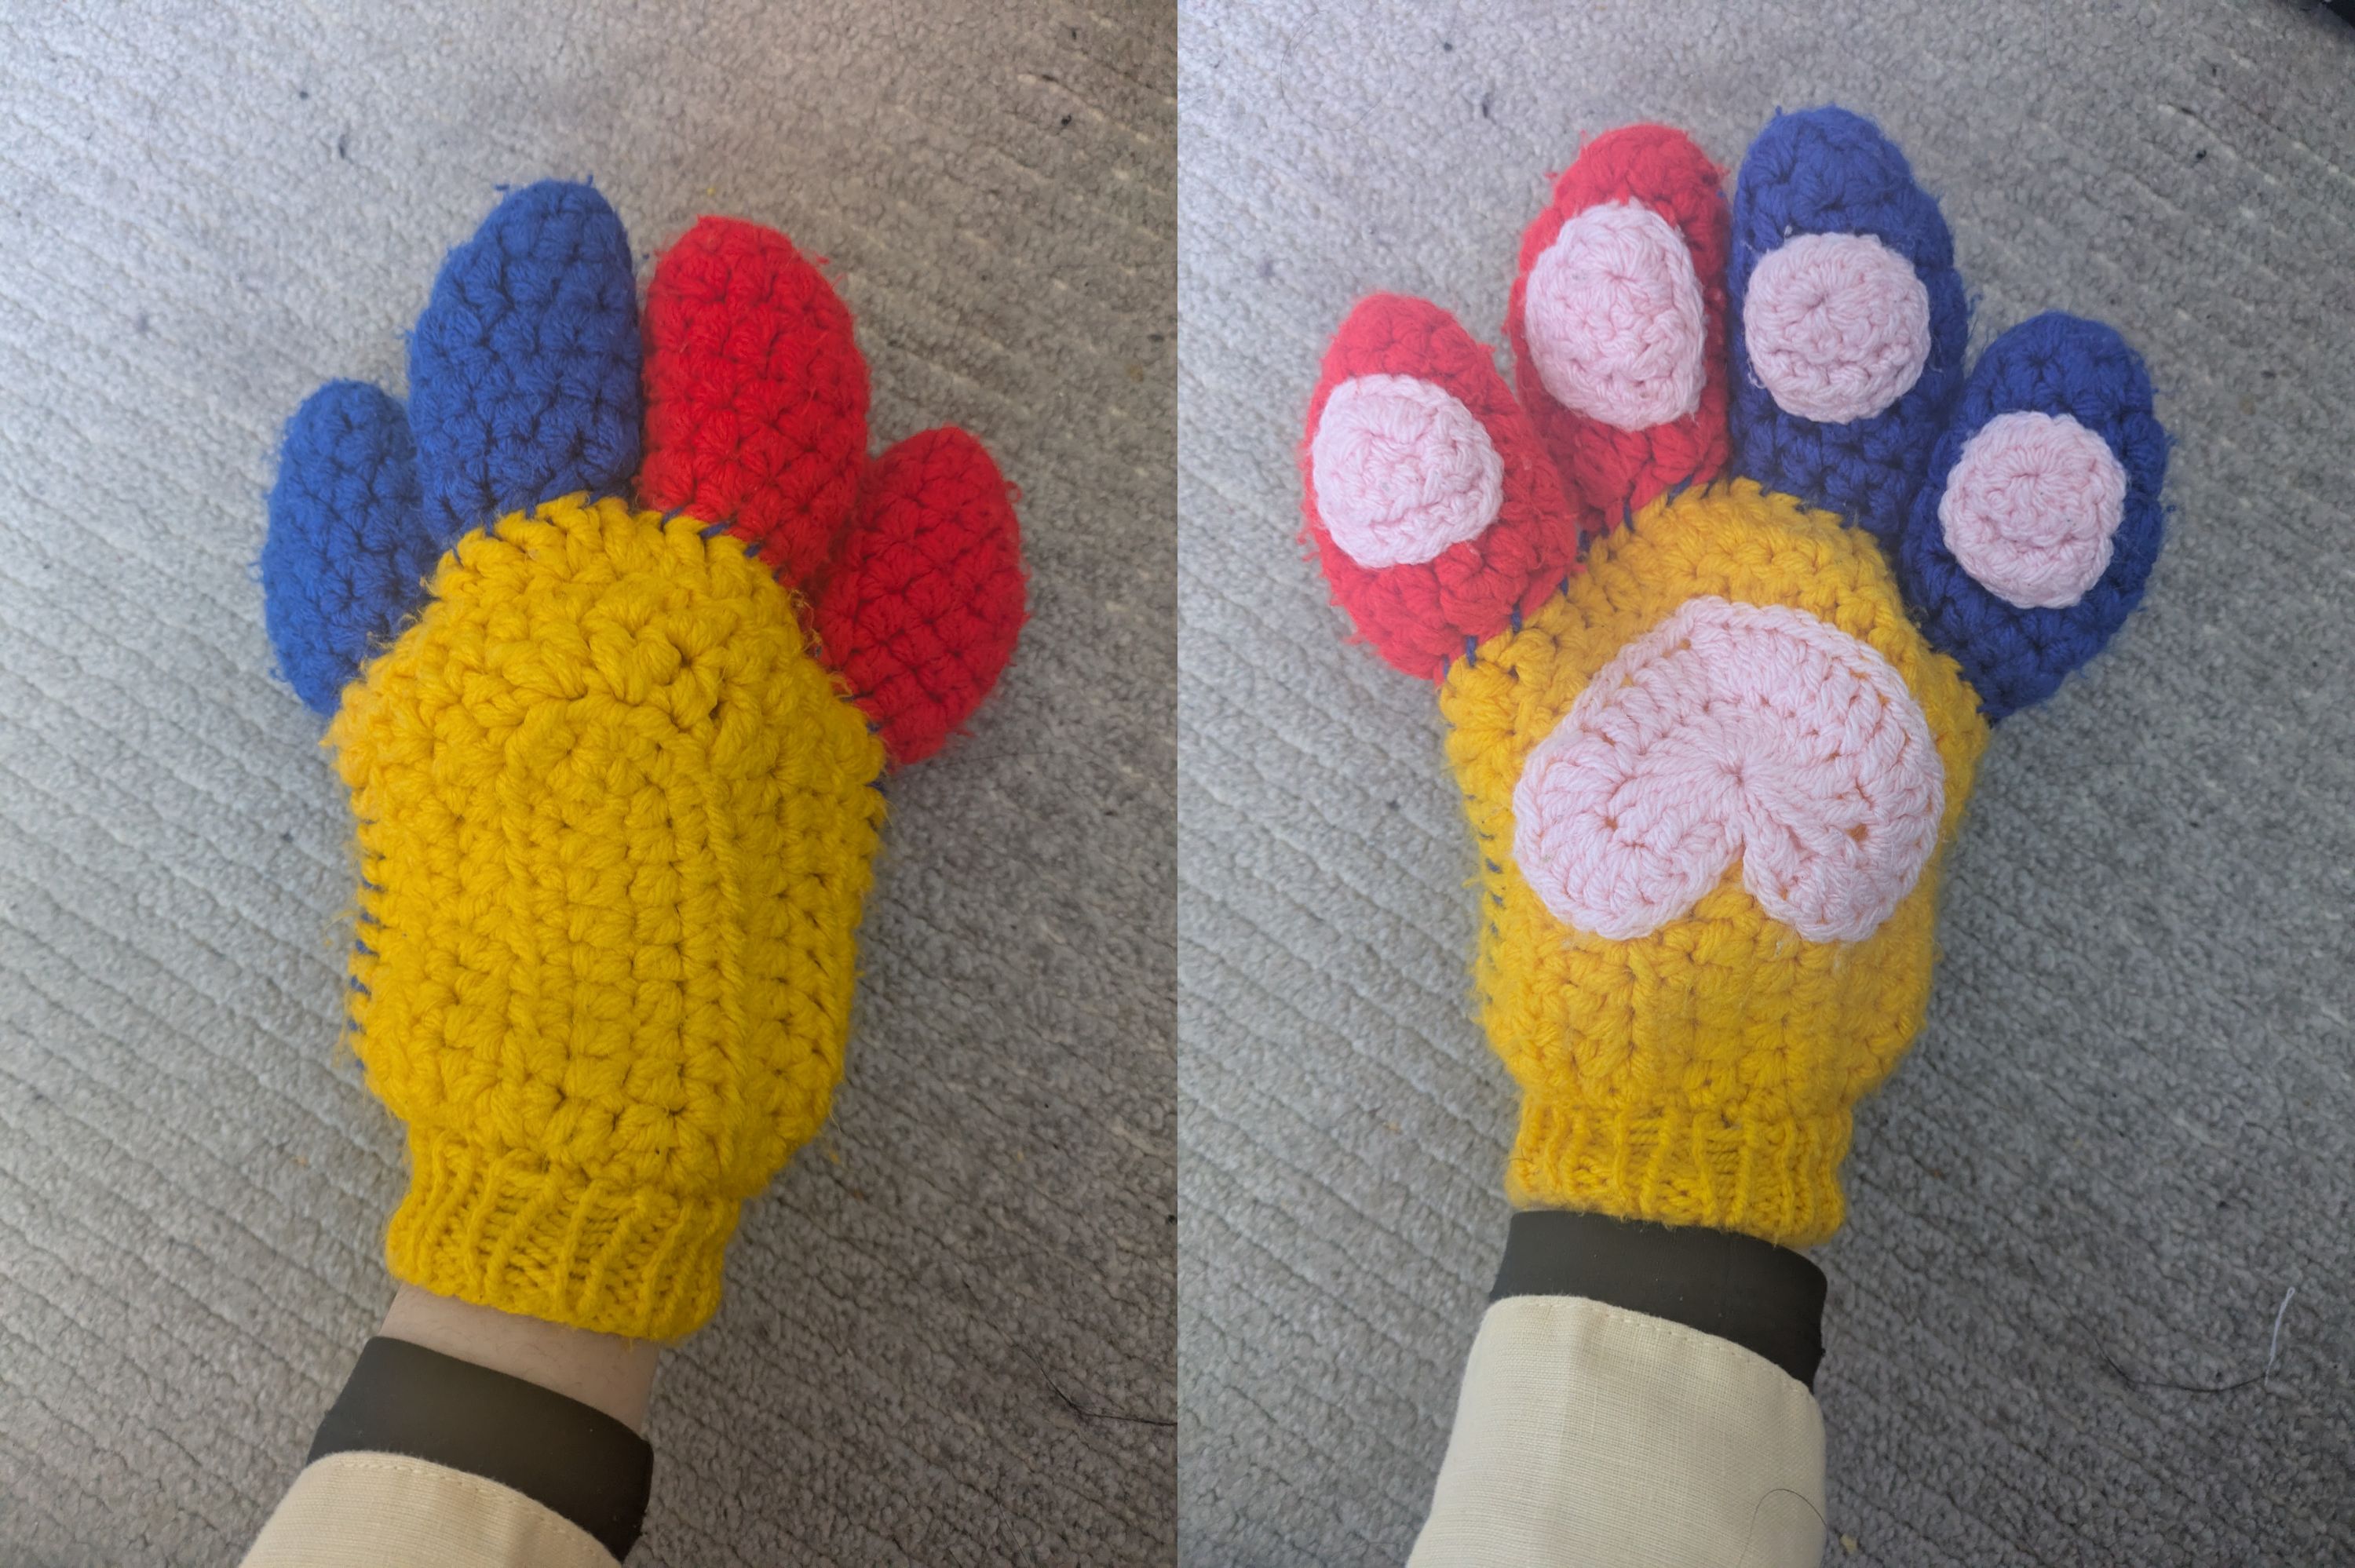
Center Paw Pad
Use a 6.0 mm hook and single stranded yarn in the color of your choice.
Round 1: magic ring, ch 3, 3tr, 4dc, 1tr, 4dc, 3tr, ch 3, sl St into magic ring (19)
Round 2: 2 sc into the gap between the chain 3 and the first treble crochet. (3dc inc) x3, 3dc, 2dc inc, 1dc 1tr 1dc into the same St, 2dc inc, 3dc, (3dc inc) x3, 2sc around the post of the last treble crochet, sl St into the magic ring (35)
Fasten off and leave a tail for sewing.
Finger Pads (make 4)
Use a 6.0 mm hook and single stranded yarn in the color of your choice. This pattern alternates between going in rounds and going in rows.
Round 1: magic ring, 5hdc, 5dc, sl St into first hdc (10)
Row 2: ch1, turn, 5hdc (5)
Row 3: ch1, turn, 1sc, 3hdc, 1sc (5)
Row 4: ch1, turn, 4sc, 1hdc (5)
The 5th round is different depending on if you're making finger pads for the left two fingers or the right two fingers.
Round 5 (left side): turn, slip stitch around the ENTIRE finger pad.
Fasten off and leave a tail for sewing.
Round 5 (right side): don't turn, slip stitch around the ENTIRE finger pad.
Fasten off and leave a tail for sewing.
Choose which side of your paw glove you want to be the palm side. Sew the pads to that side.
Repeat the entire pattern to make your second paw glove.
Note: I recommend adding cuffs to the paws to prevent slipping and to achieve a cleaner look. I didn't add instructions for those, but there's a variety of tutorials for sleeve cuffs online.