
Modeling 3D Printed Follow-Me Fursuit Eyes in Blender
A FREE download of this eye is available on my Gumroad! You get both the ready-to-print file and the .blend file, with all the stages of progress. Feel free to follow along with the image provided, or follow along with your own image!This tutorial utilizes Blender, a free and open source 3D program.
Let's model some 3D fursuit eyes with custom shaped pupils!
This tutorial has been adapted from Freckled Cat Creations' Youtube video, with some additions and modifications. This tutorial assumes you do not have any Blender knowledge.
A following fursuit eye uses a simple optical illusion that makes it seem as if the eyes are looking at the viewer. The eyes have a wall around them that hides part of the sclera/pupil, making it appear as if they are always watching you. Some people make their following eyes out of foamies or resin, but I prefer 3D printed eyes as they are durable, lightweight, and don't require casting.
Shaping the Sclera
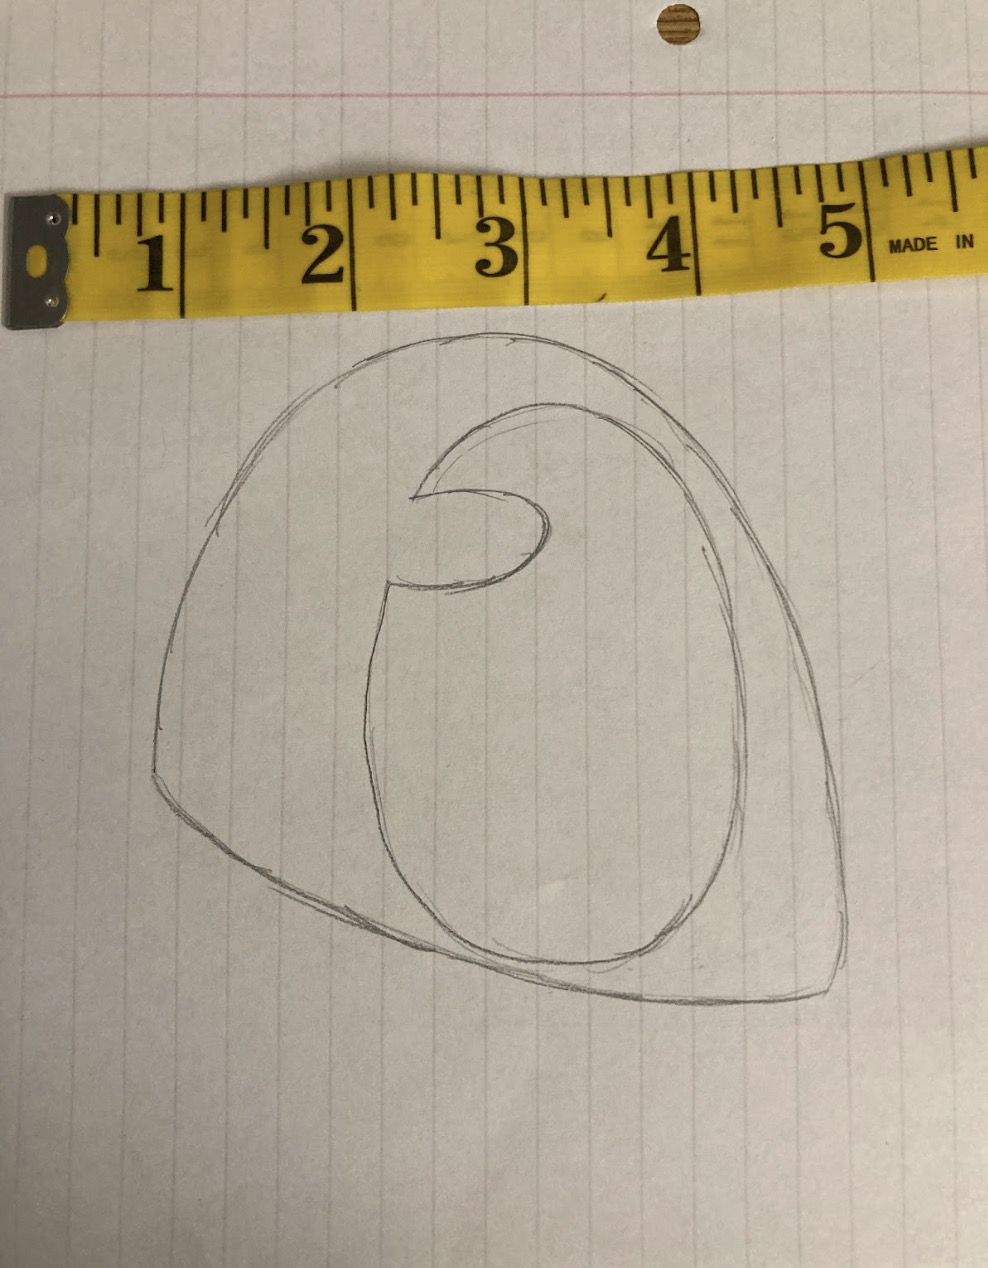
Start with a to-scale sketch of your desired shape, and take a picture of it with a ruler next to it.
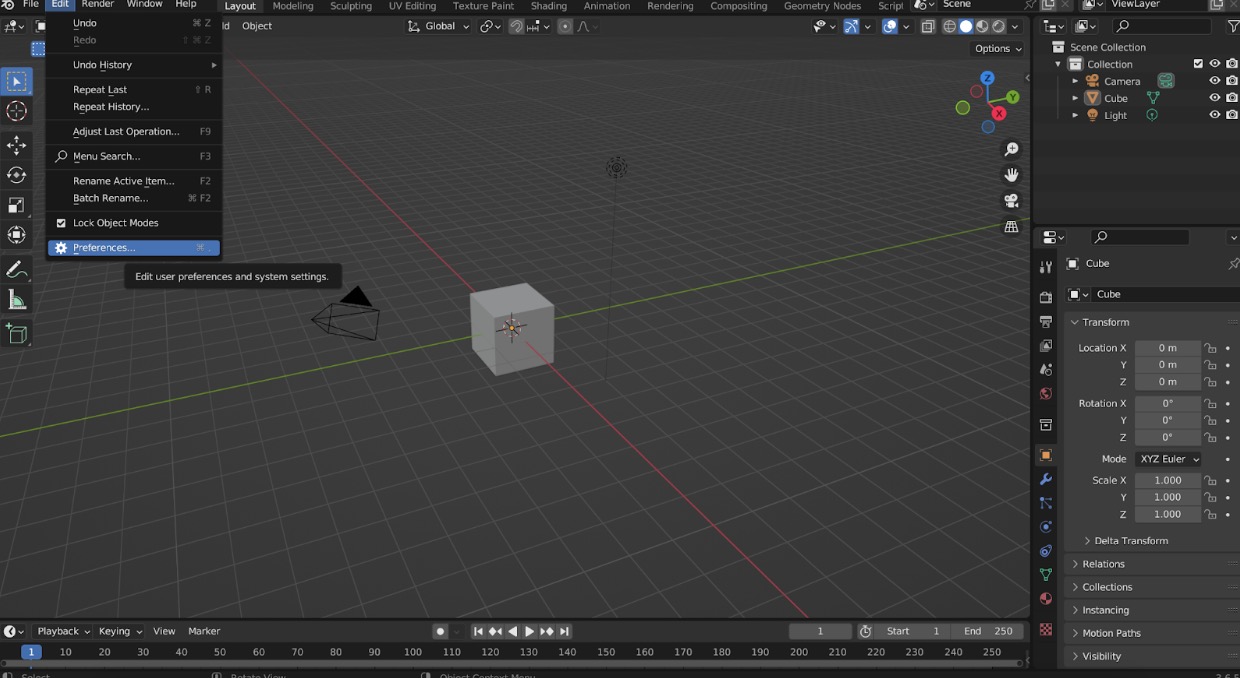
Open Blender, then navigate to preferences.

Navigate to “Input”, then check “emulate numpad” under the keyboard menu.
Click on the cube, then hit X to delete it. Do the same for the camera and the light.
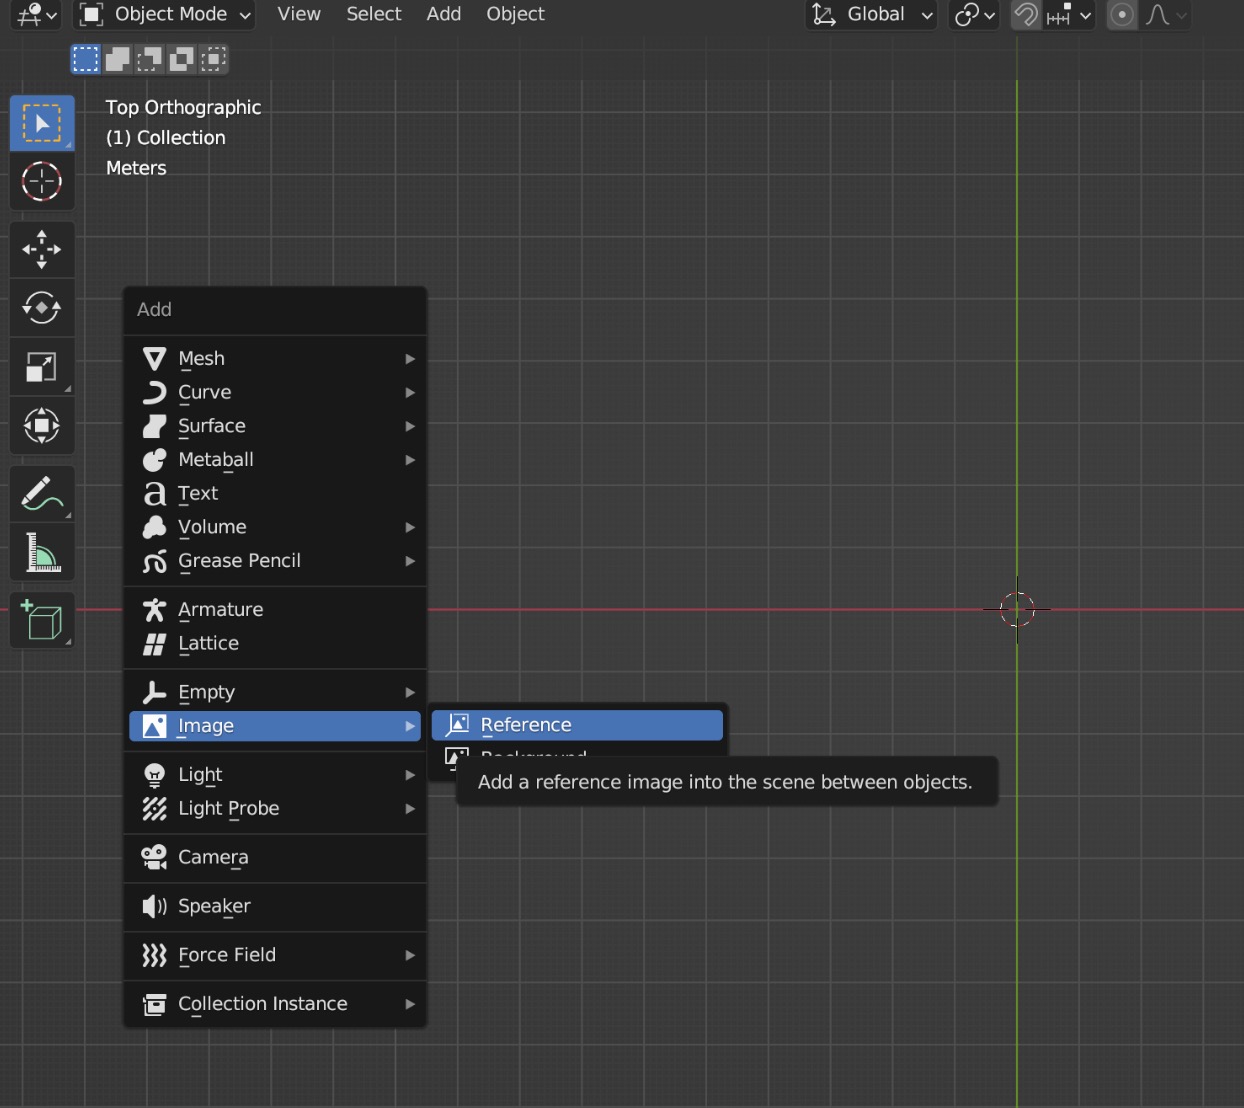
Hit 7 to enter top-down view. Hit Shift and A, and add a new reference image.
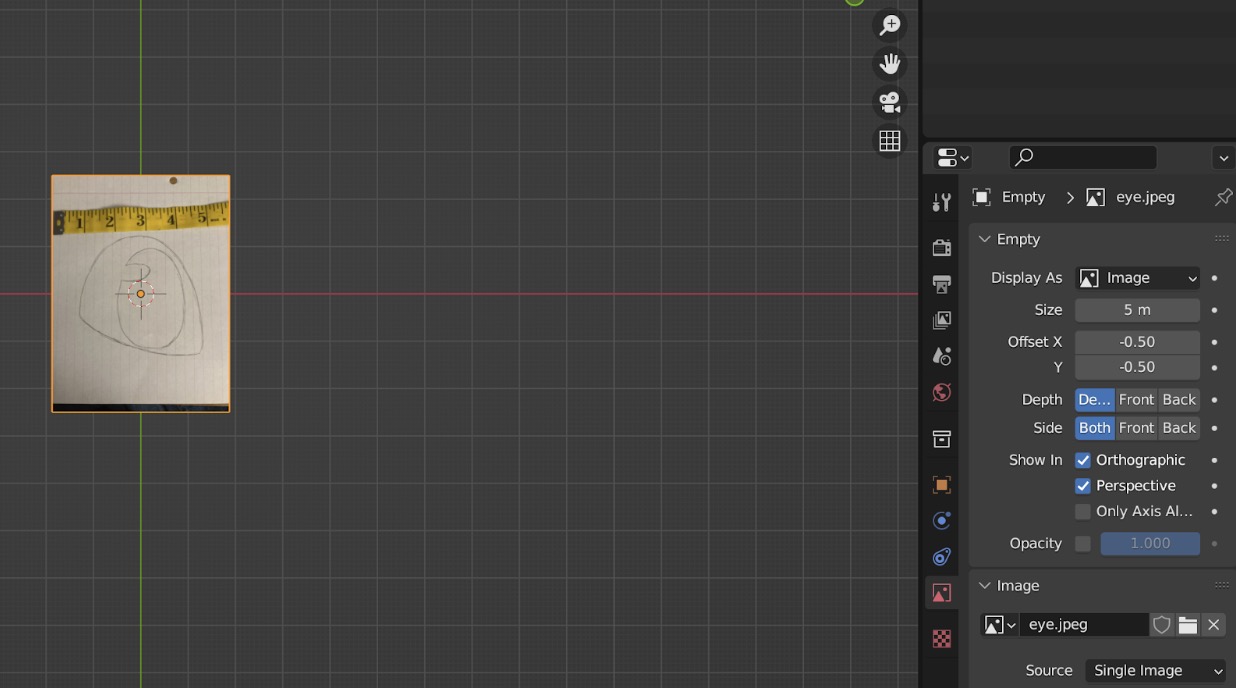
Click on the picture frame.
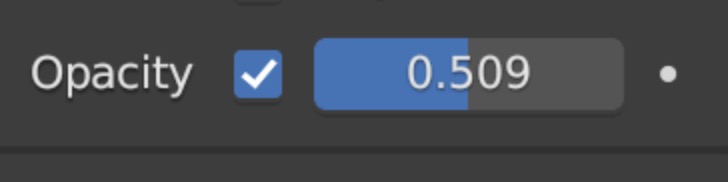
Enable opacity and set it to around 0.5. This will make the image easier to see.
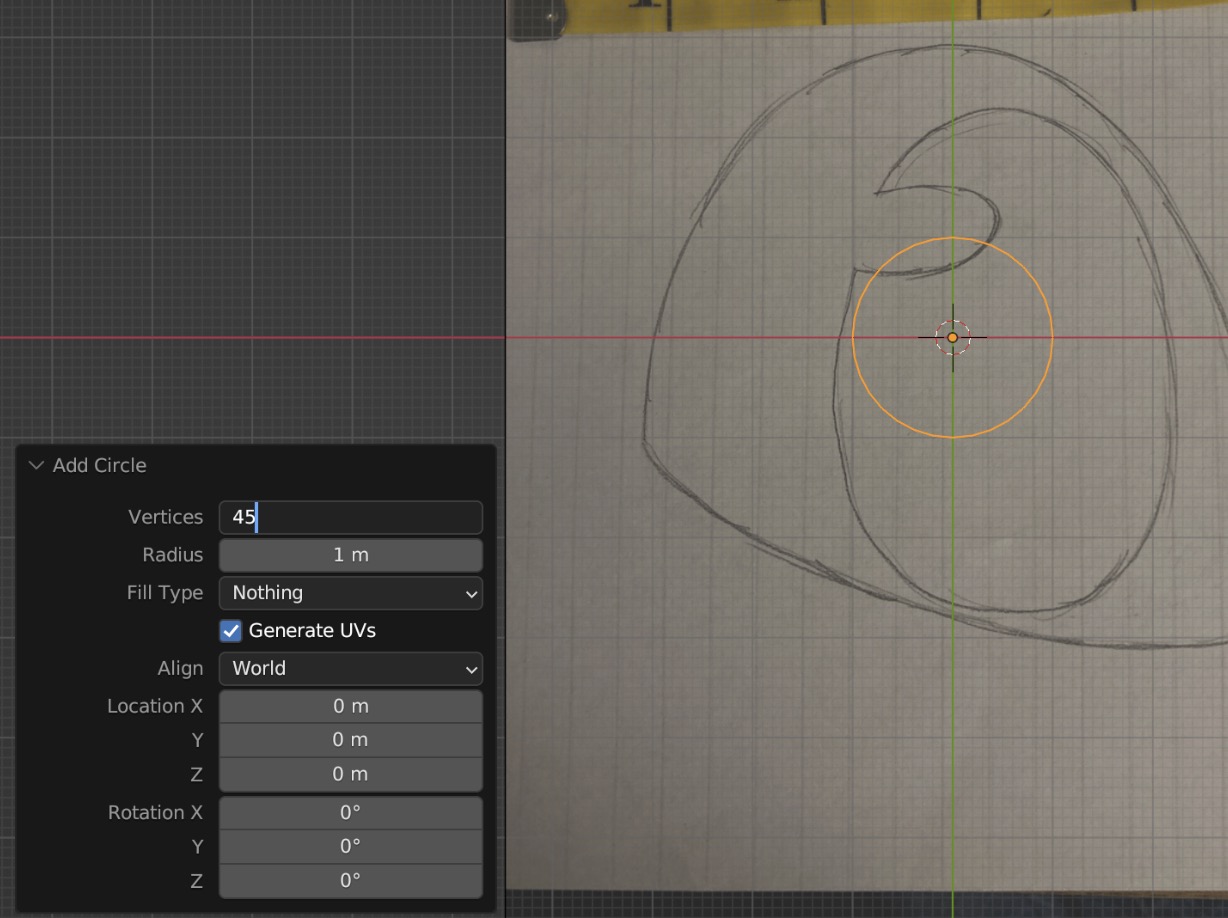
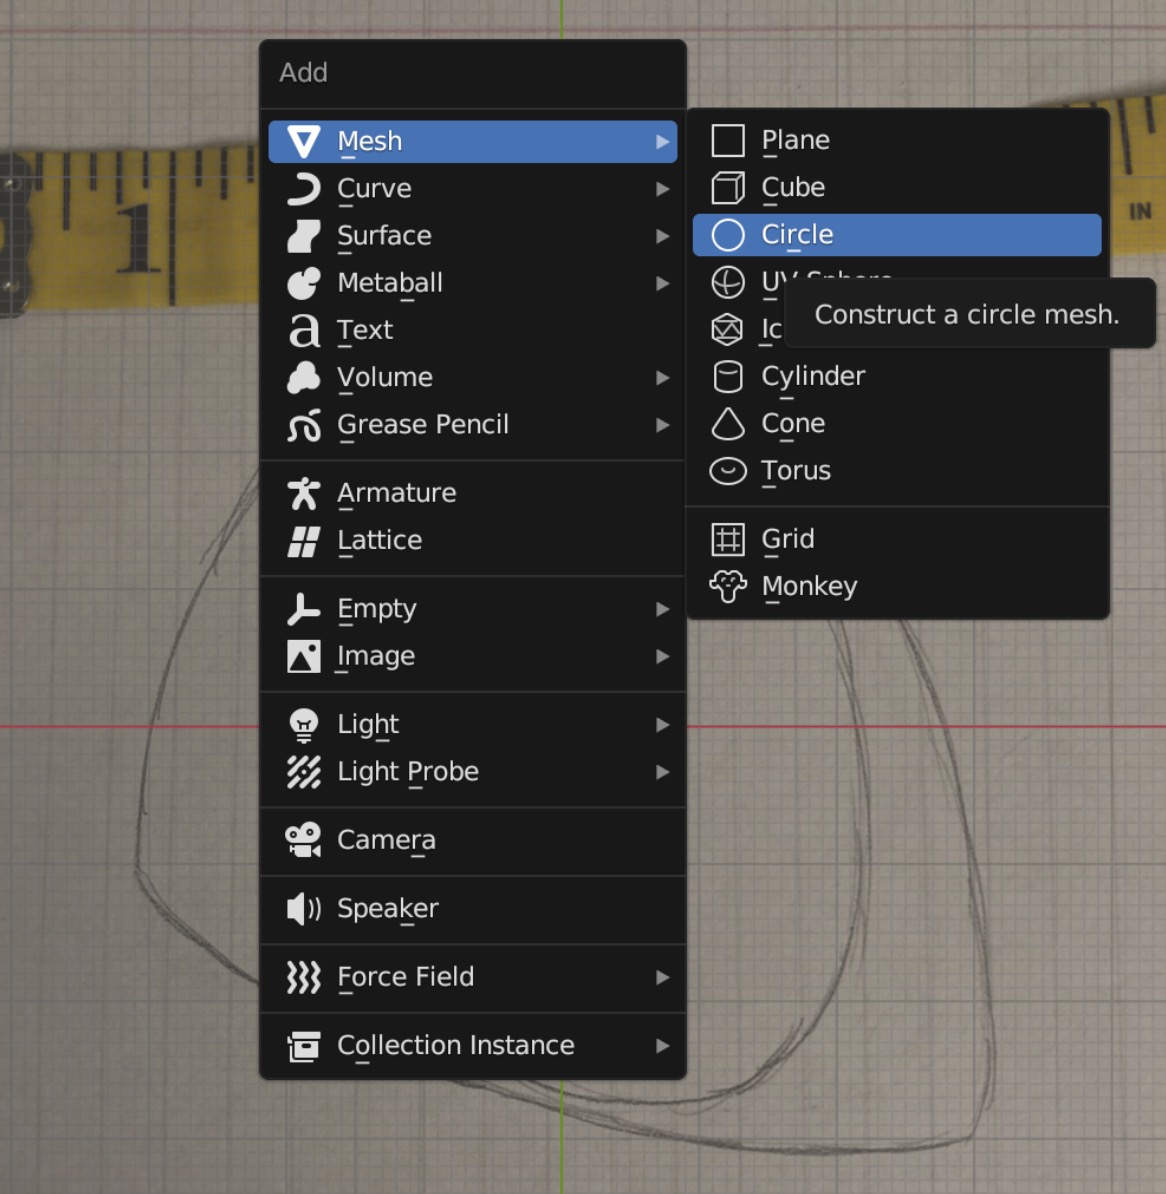
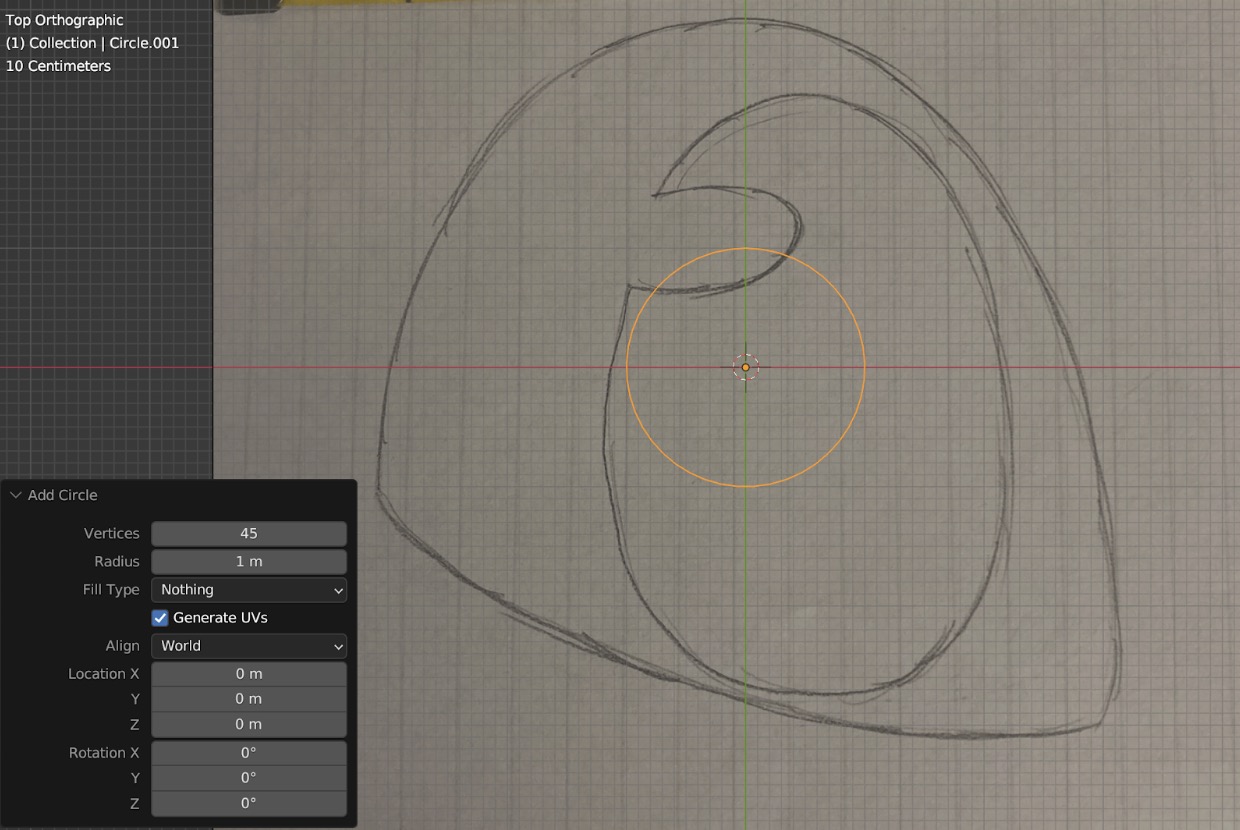
I pressed S to scale the drawing up to make it easier to work with. Don't worry about accurate sizing yet, that'll come later! Hit Shift A again, but this time add a circle.
A bar will appear in the bottom left corner. Click it to expand the menu, then change vertices to 45.
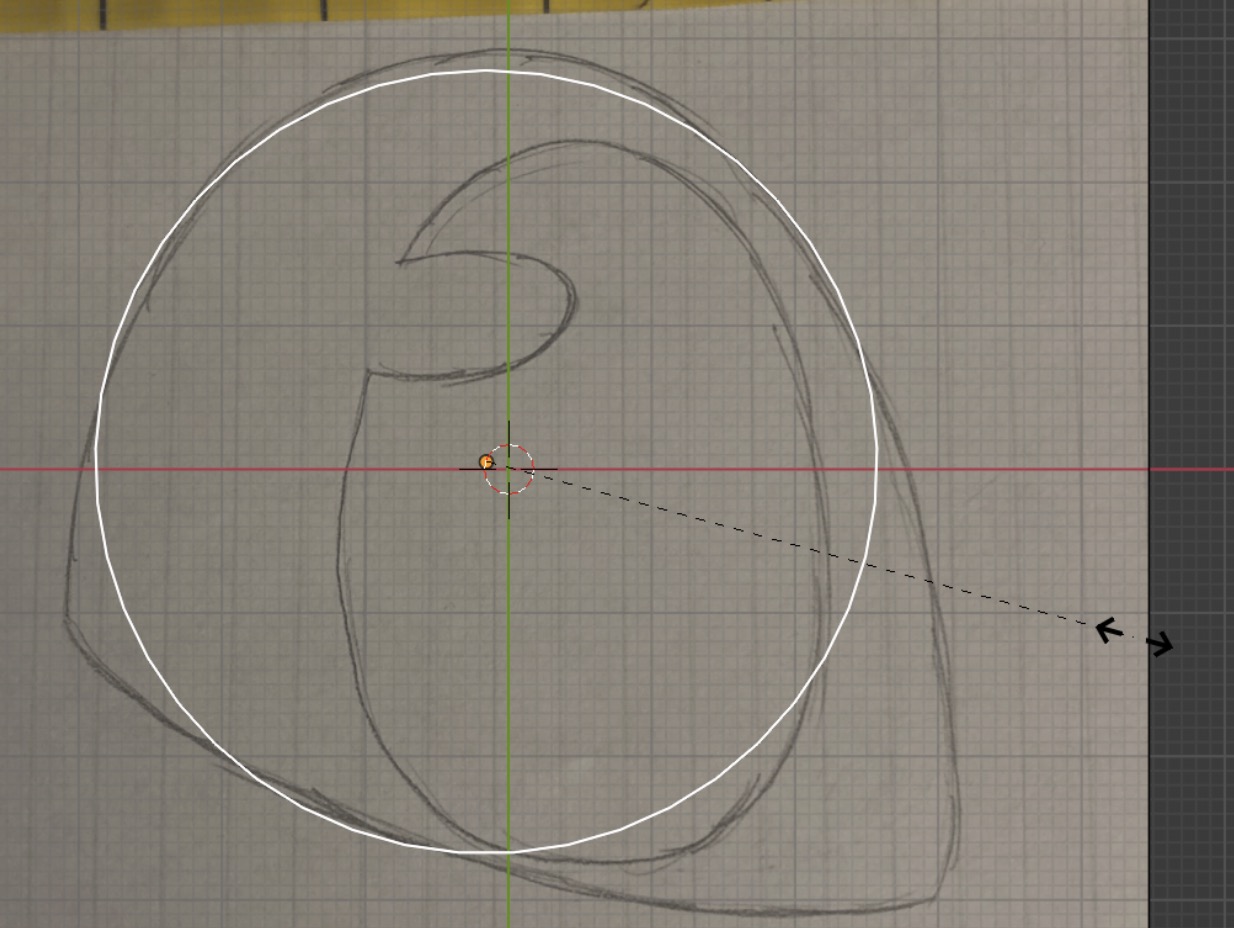
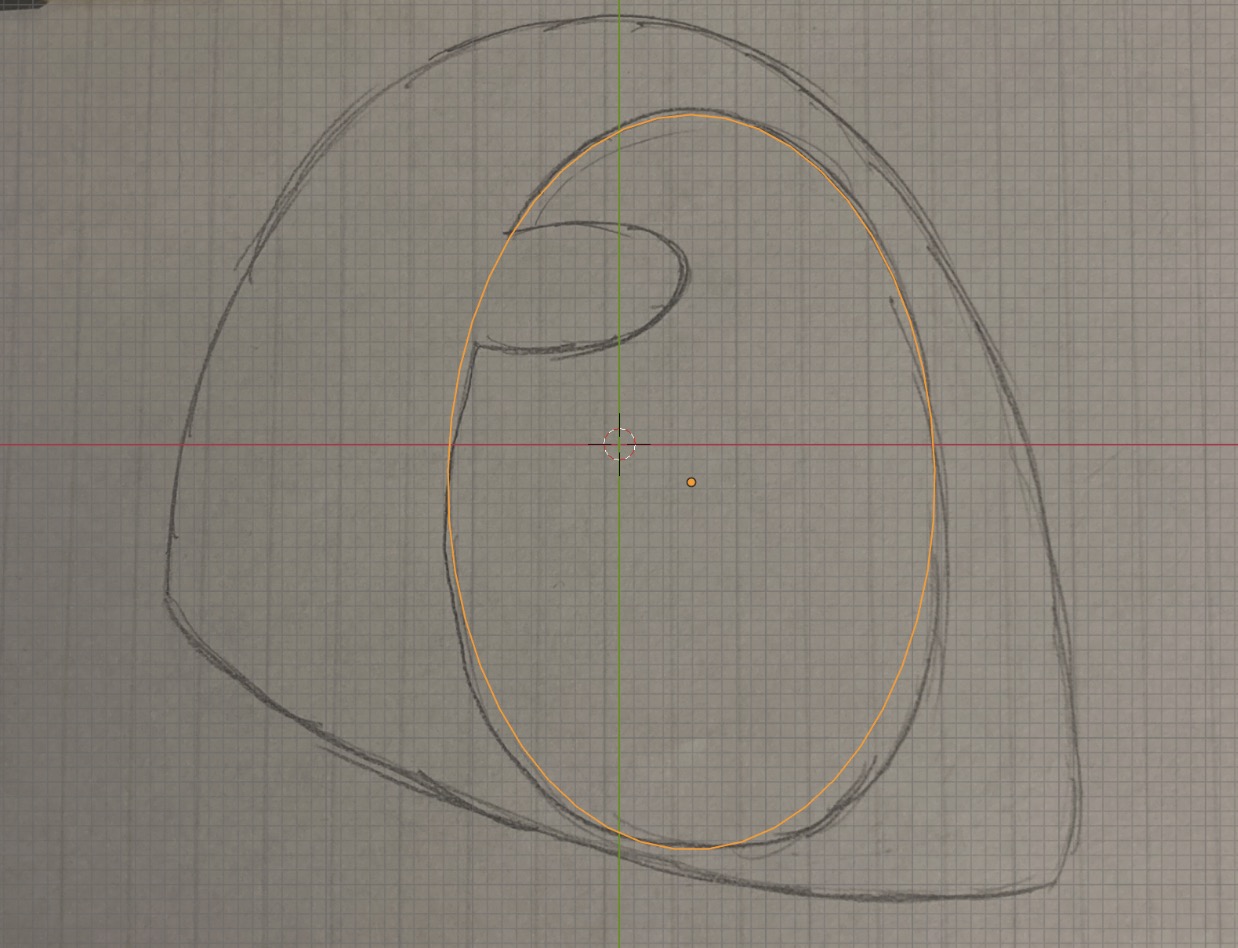
Scale the circle to fit your drawing.
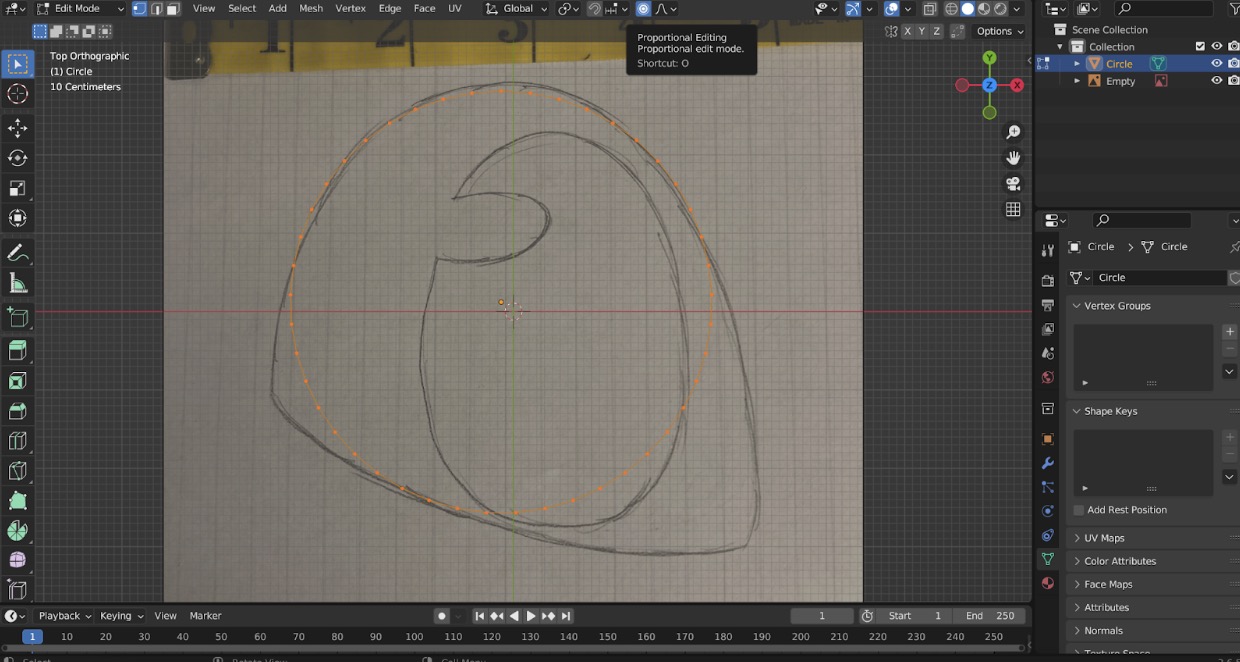
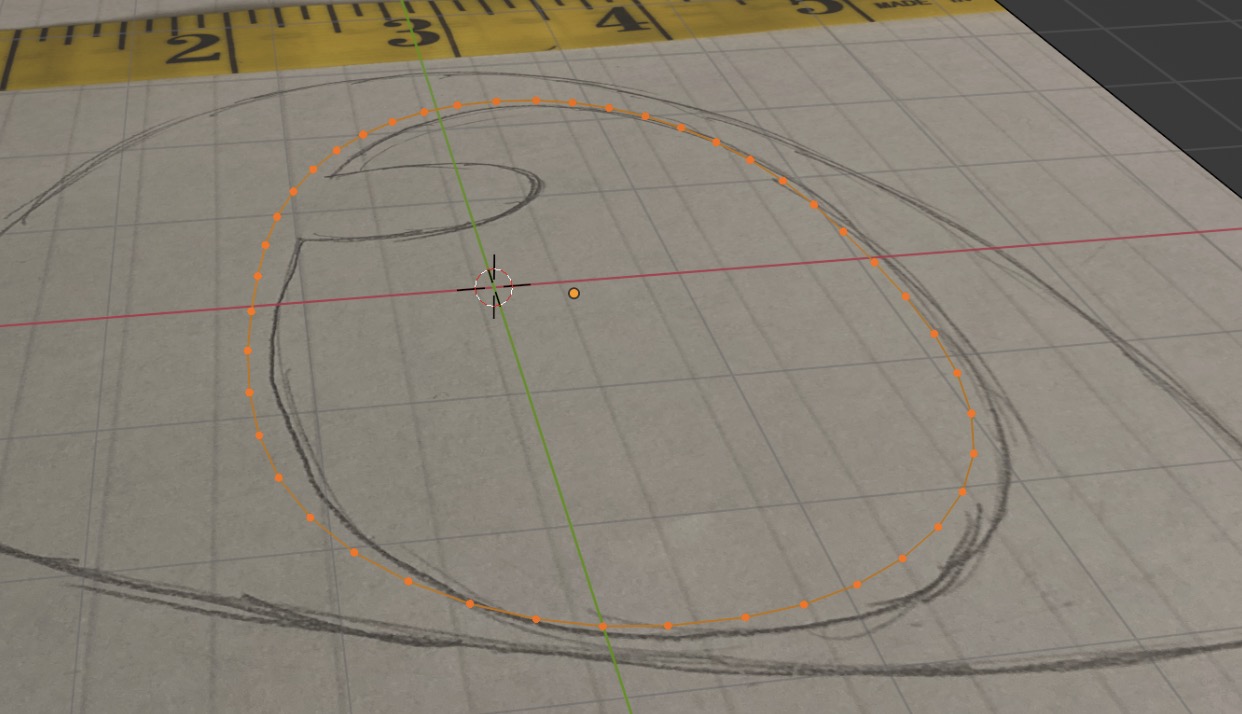
Hit tab to go into edit mode. Enable proportional editing in the top bar.
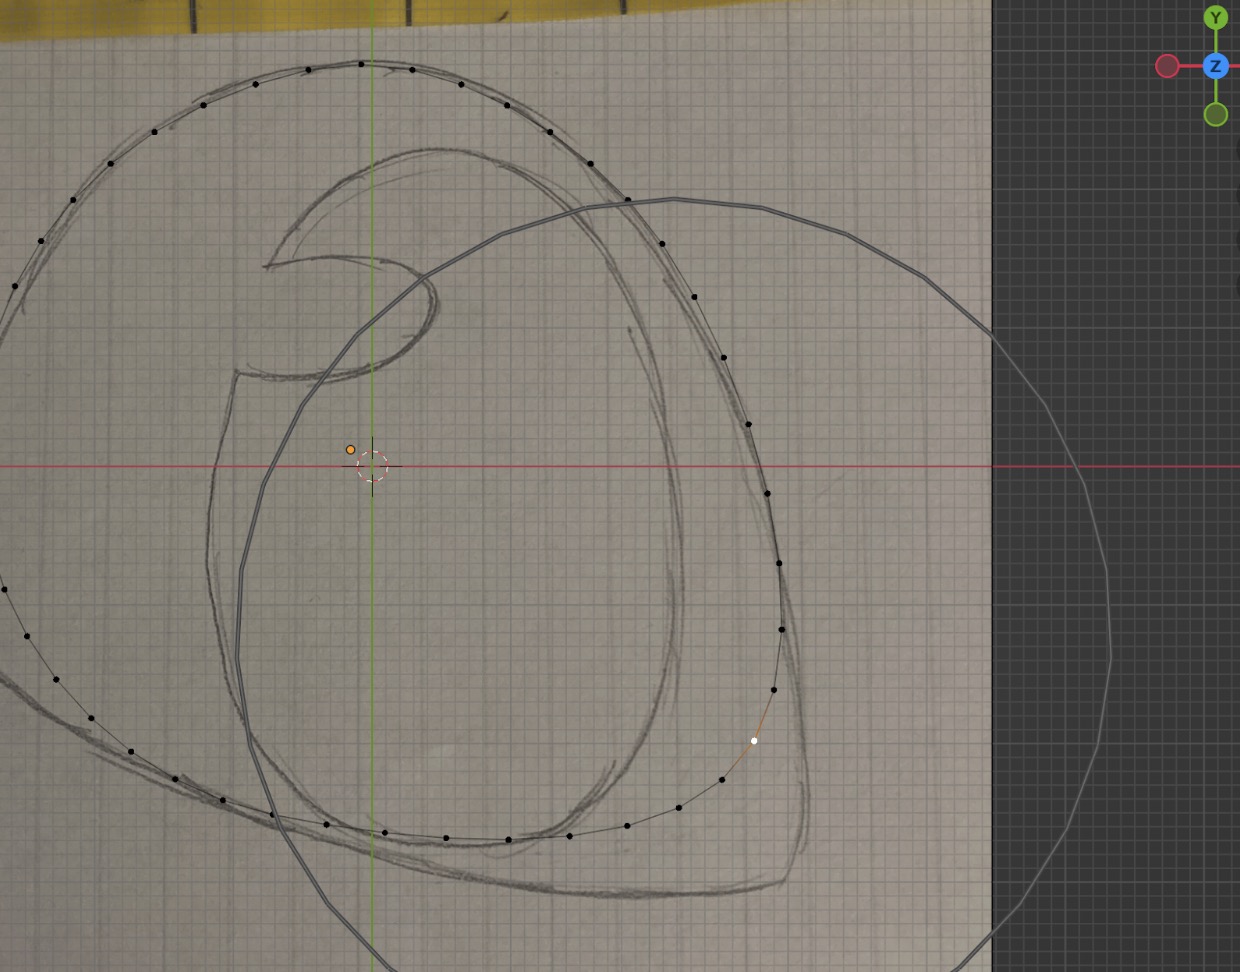
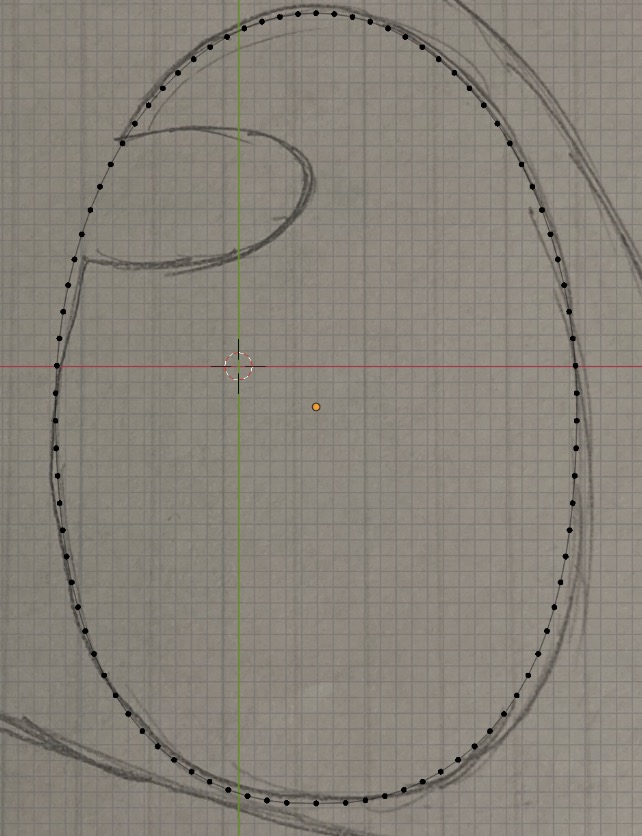
Click on a vertice, then hit G to move it. Use your trackpad or mouse wheel to control the radius of the affected area.
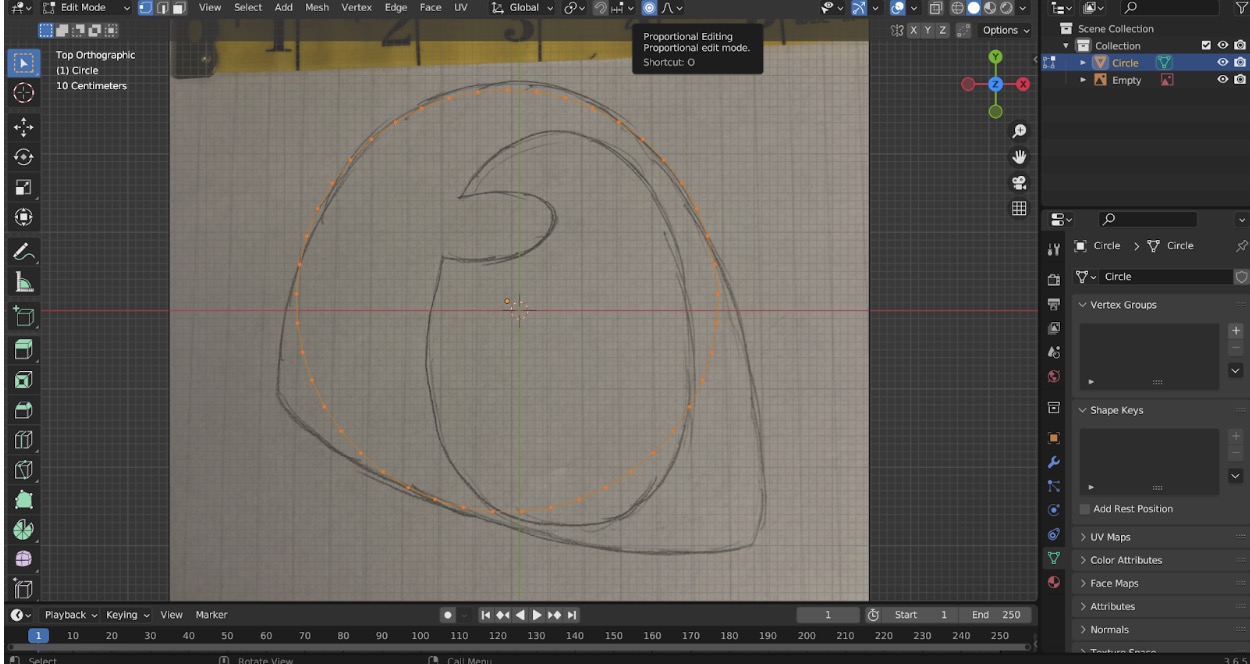
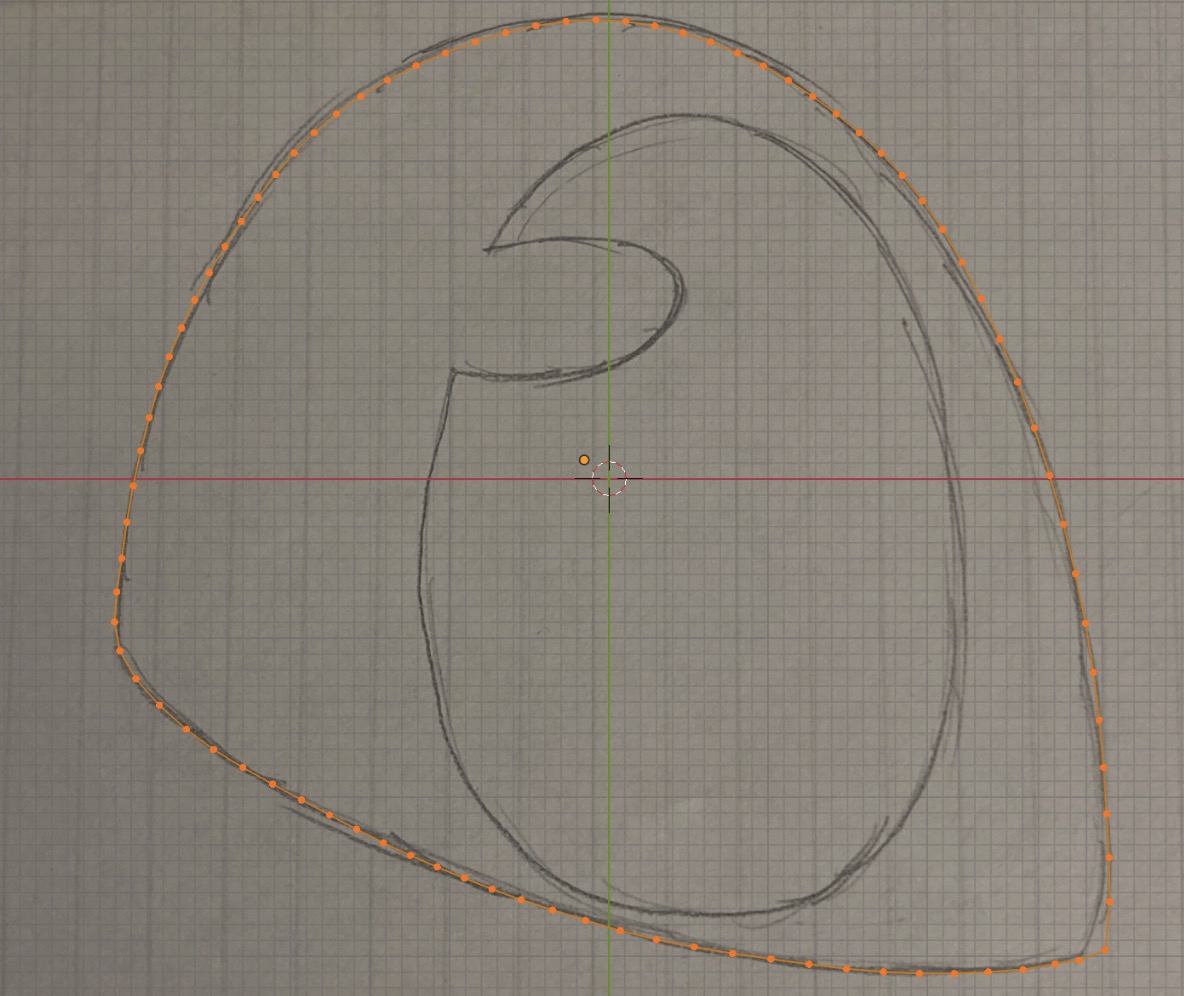
Continue until your eye shape is done. You can hit A to highlight all the points to see if you're on the right track. Once done, hit tab to go back to object mode.
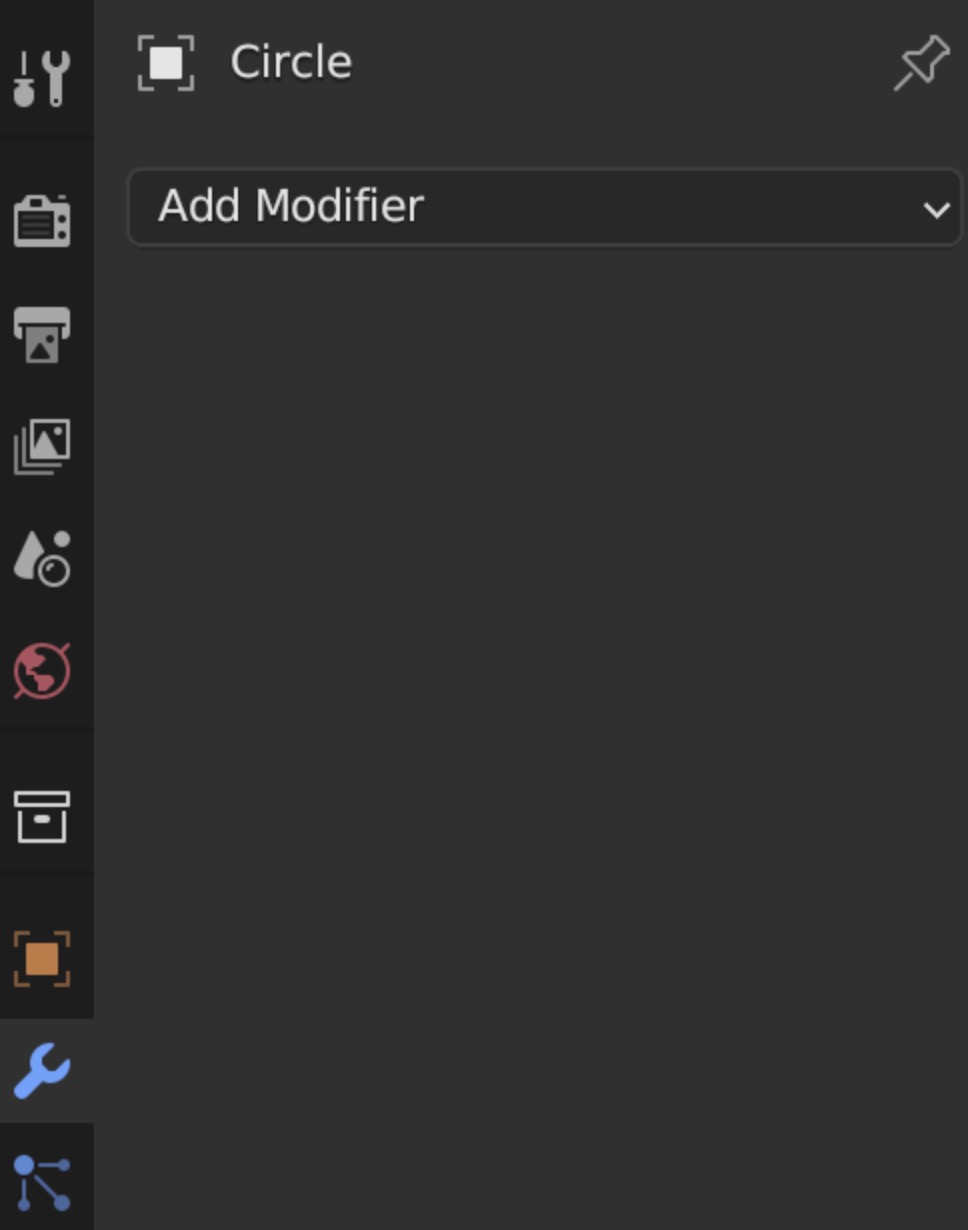
In the right sidebar, click on the wrench. Click on “Add Modifier”.
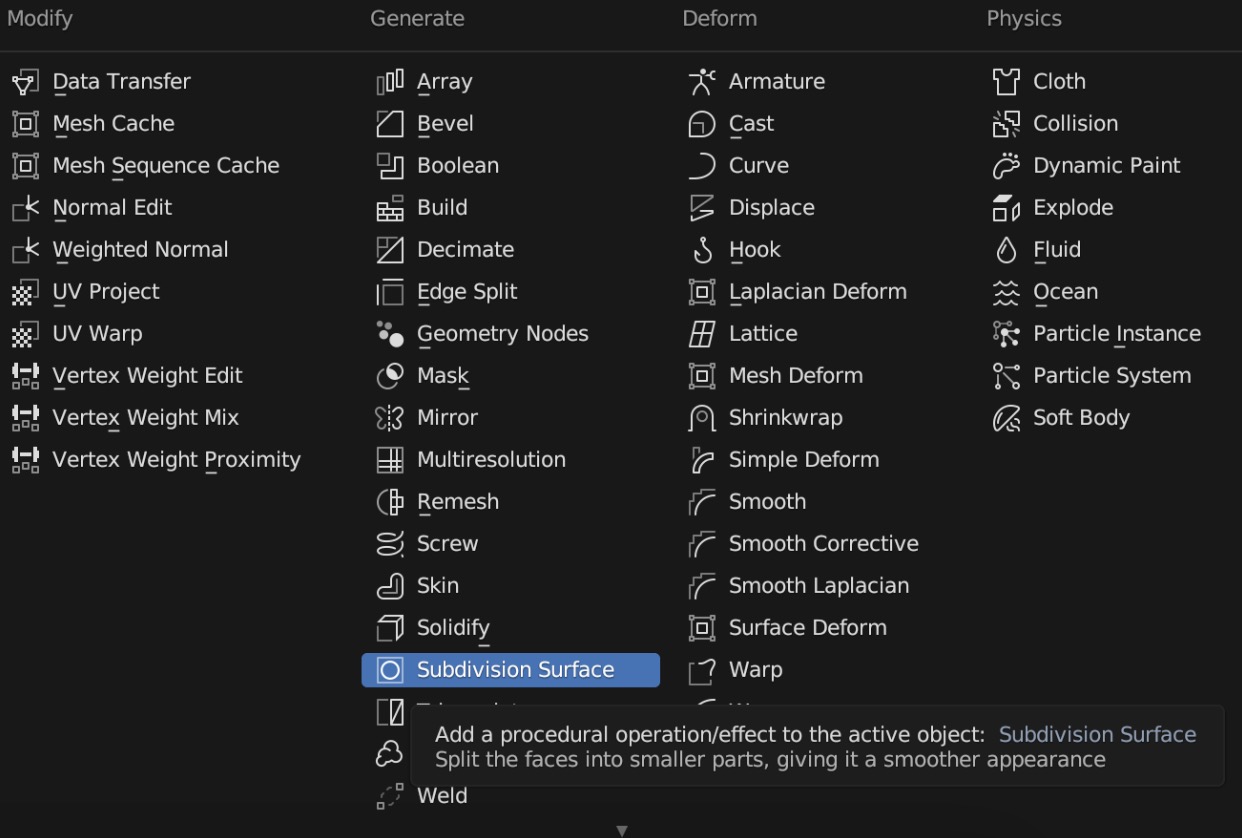
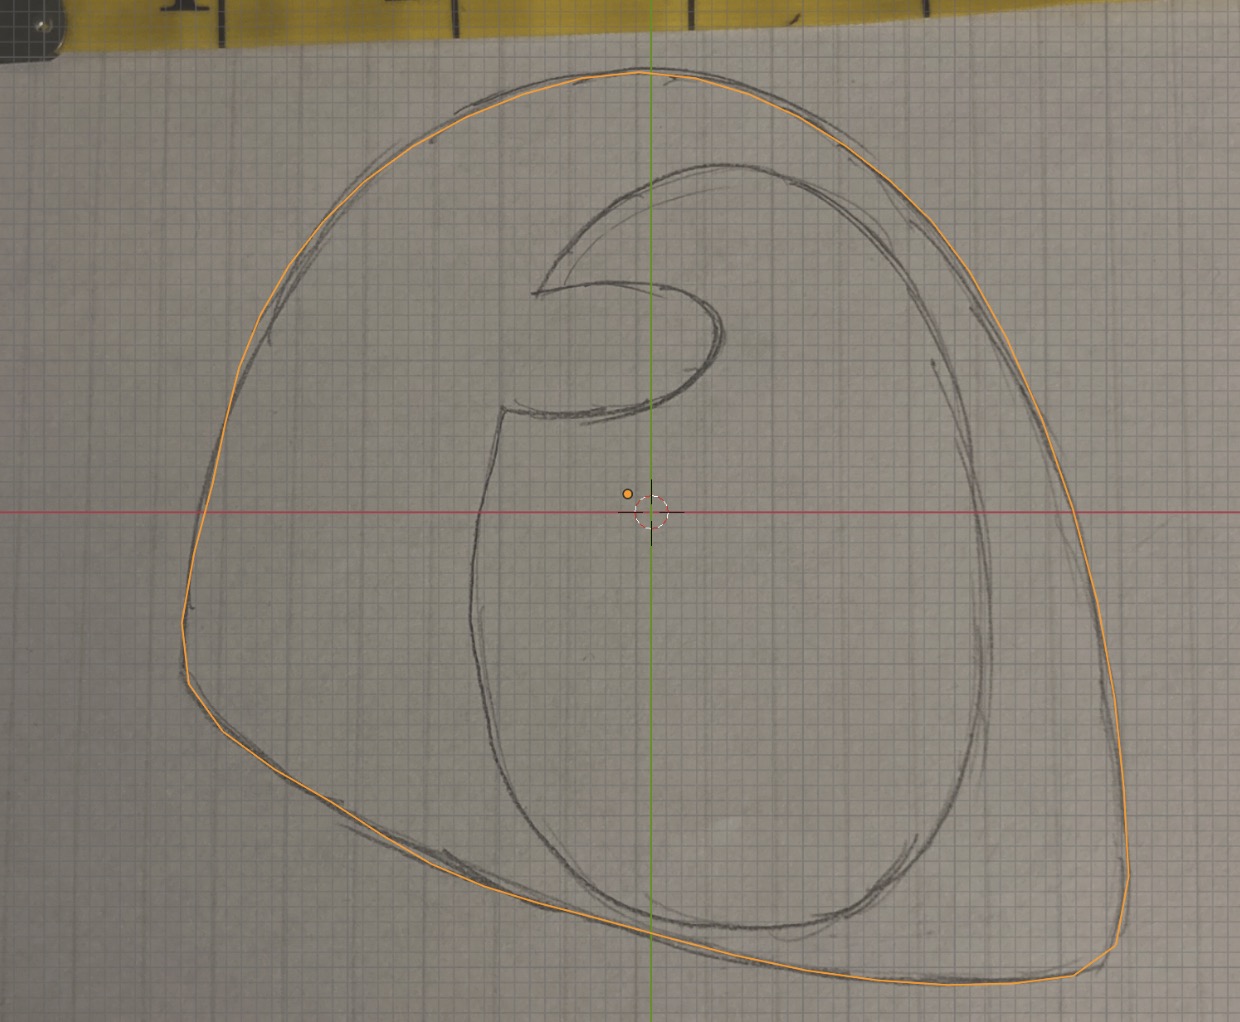
Click on “Subdivision Surface”. This adds more points and makes them a lot smoother.
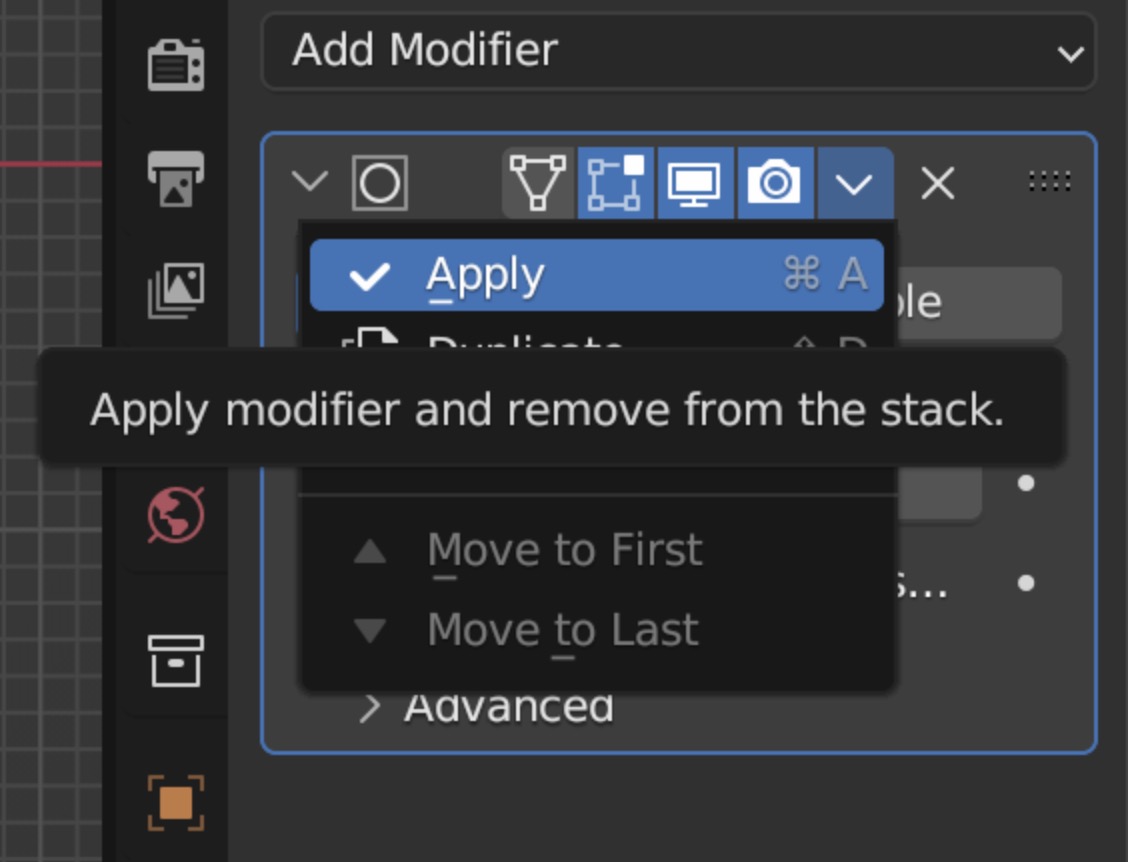
Click on the down arrow to apply the modifier. Hit tab to go back to edit mode.
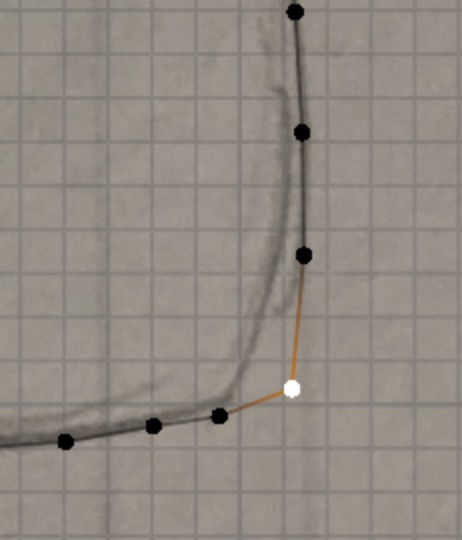
For a sharper corner, I disabled proportional editing and moved some of the vertices by hand.
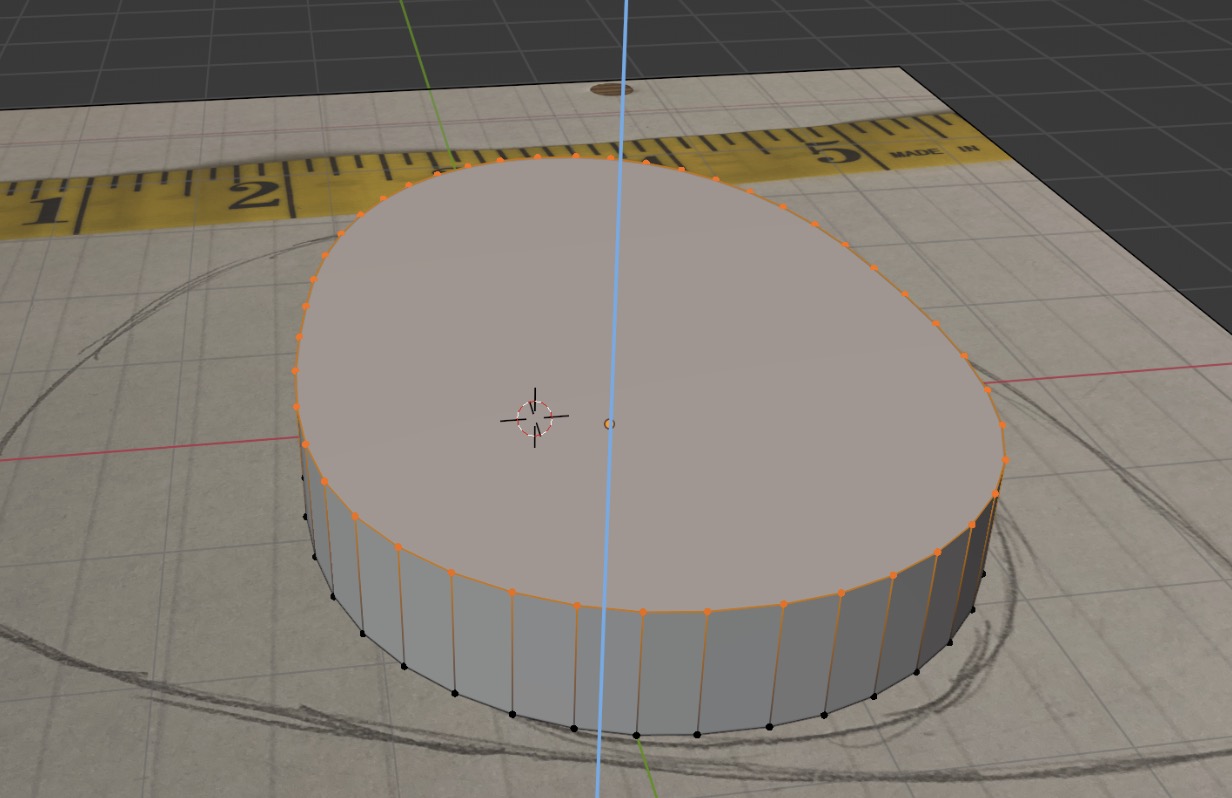
Hit A to select all the points. Hit E to extrude, then hit S.
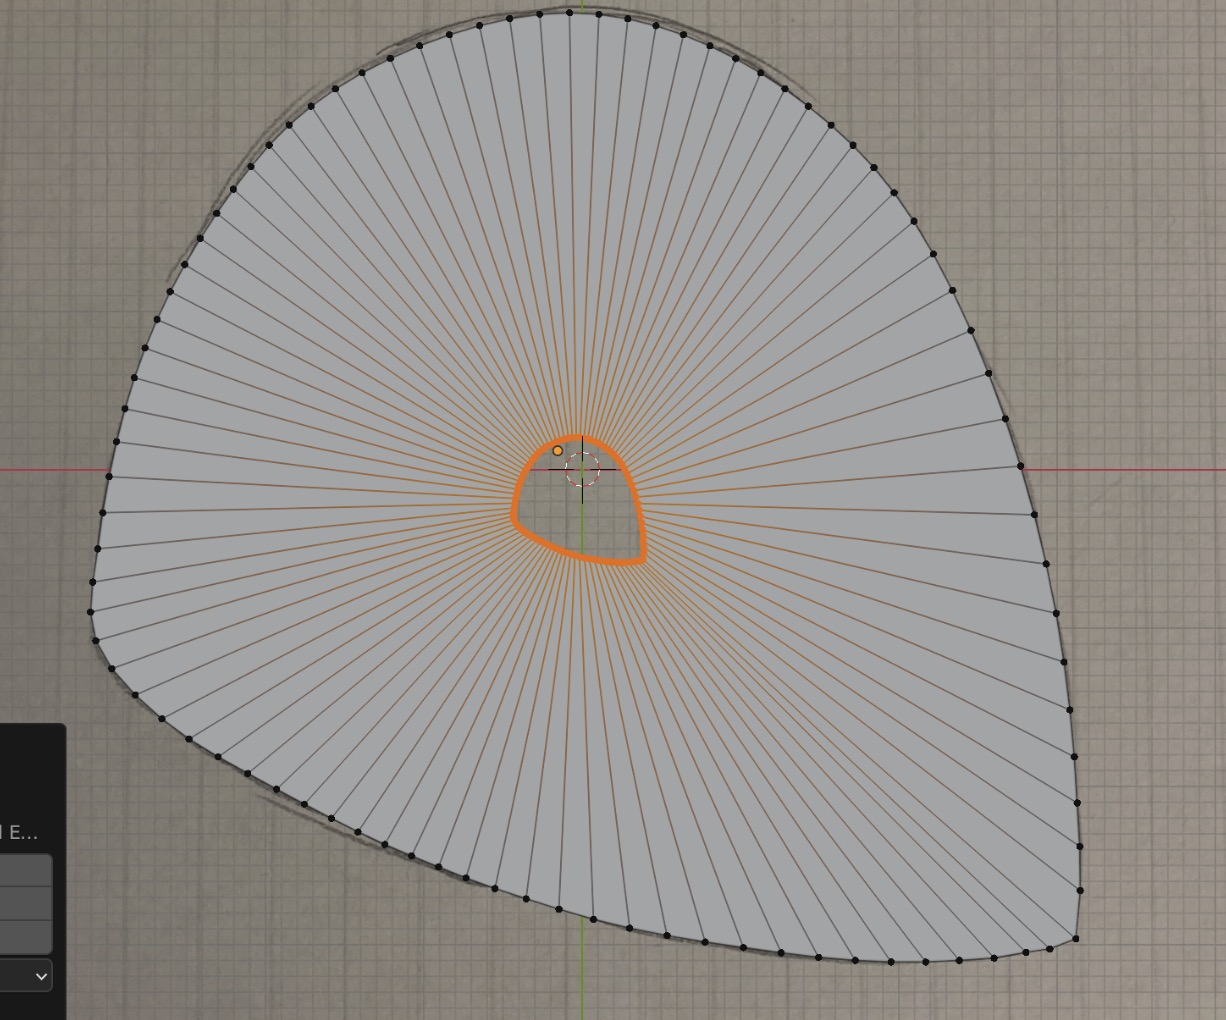
It looks like a weird donut now.
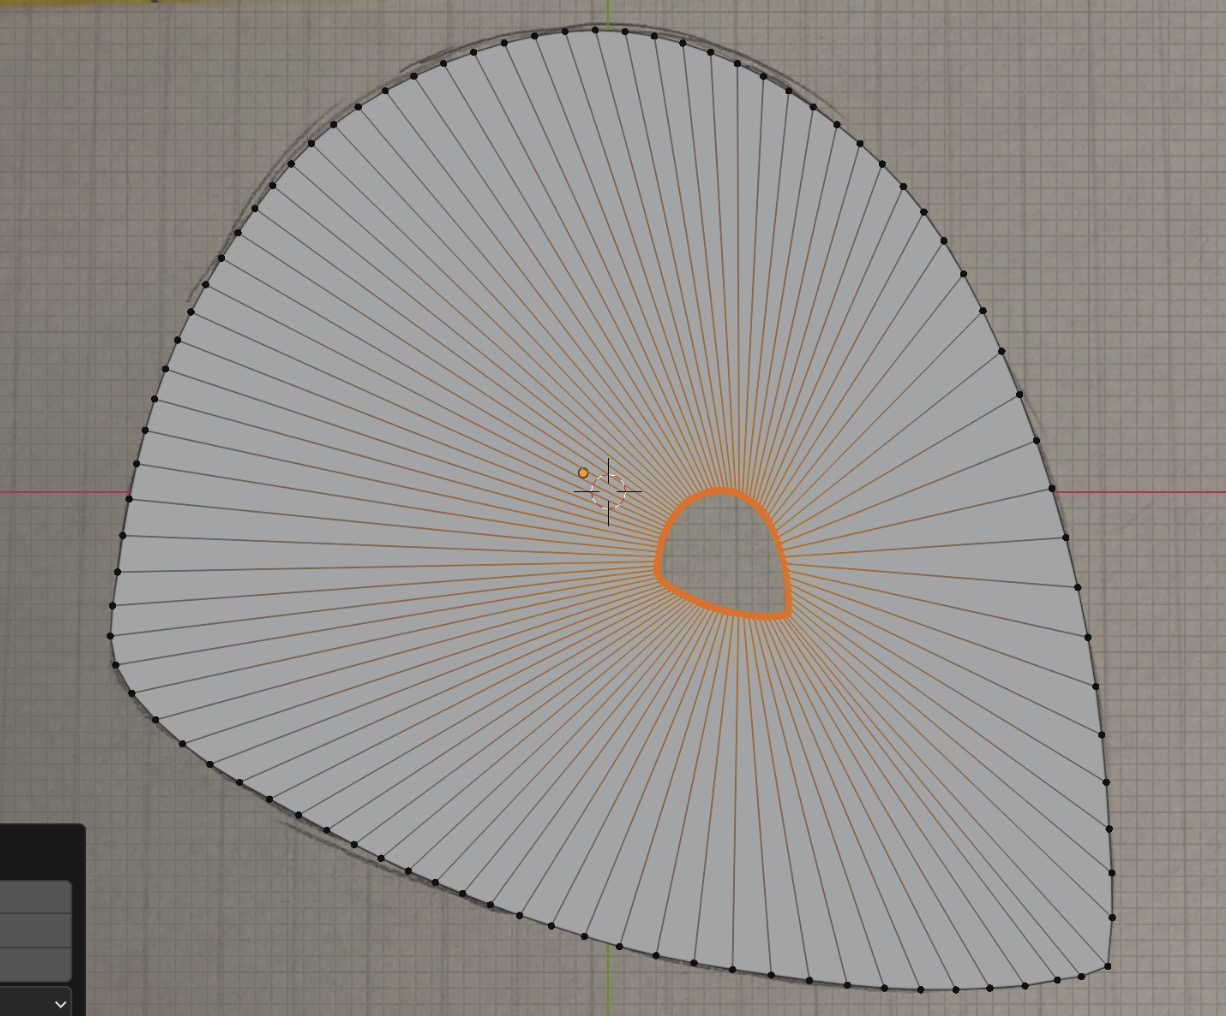
Move the donut hole to where your pupil is. Hit tab to go back to object mode, then click on the eyeball in the “Scene Collection” menu to hide the sclera.
Shaping the Pupil
Add a new circle.
Scale it so it roughly matches your drawing. If you want a perfect circle or oval, you can skip this next step! I was looking for an egg-shaped pupil, so I needed to do a little extra work.
Hit tab to go back to edit mode. Look for the butterfly, then click on the X to enable symmetry.
I used proportional editing again to get my egg shape.
Select all the points, then hit F.
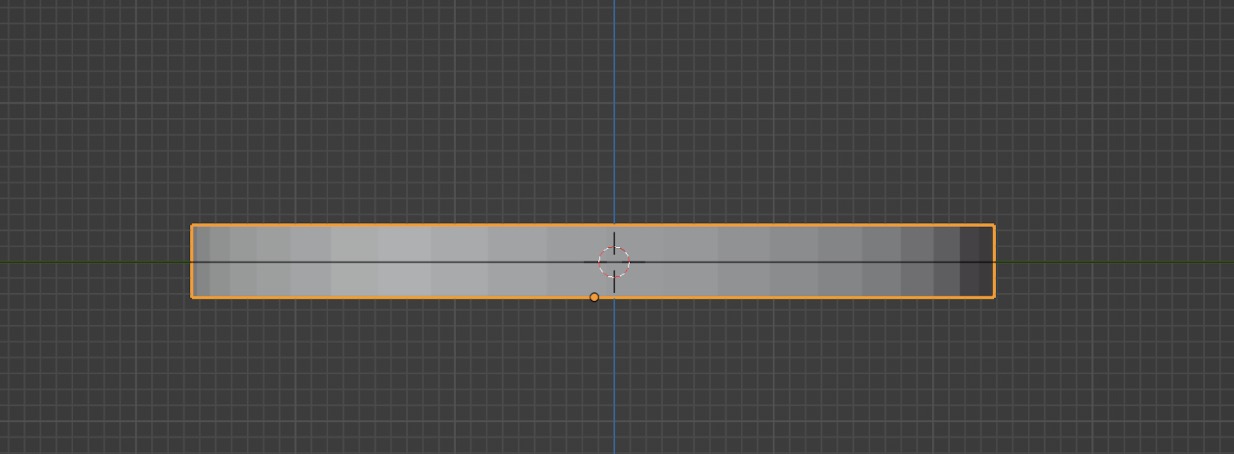
Hit E to extrude, and move it a little up. It doesn't matter how much.
Go back to object mode, hit 3 to get a side view. Hit G to move it down a little bit, so the black line is intersecting the model.
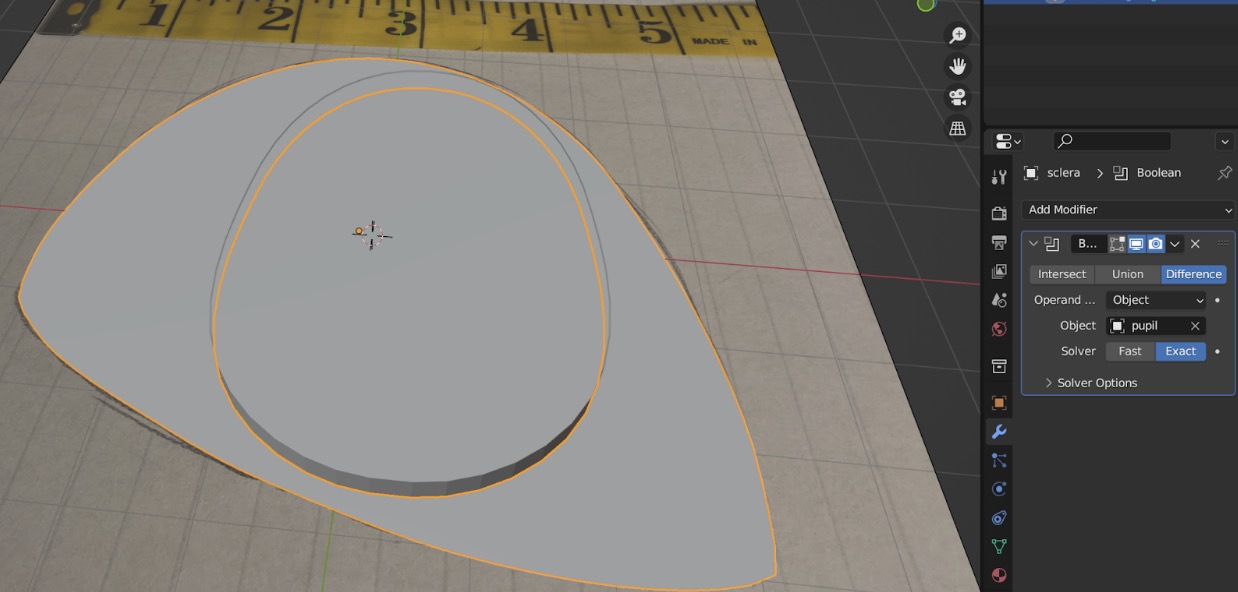
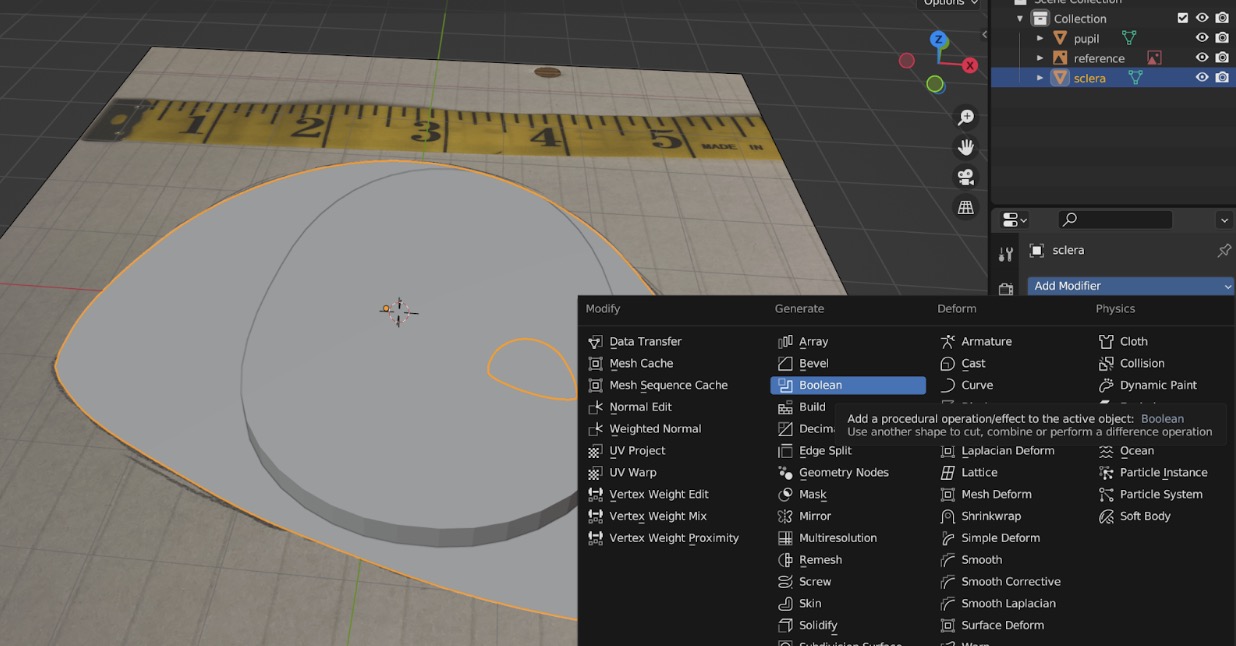
Click on your sclera mesh, and add a boolean modifier.
Click on the eyedropper, then click on your pupil. Apply the modifier.
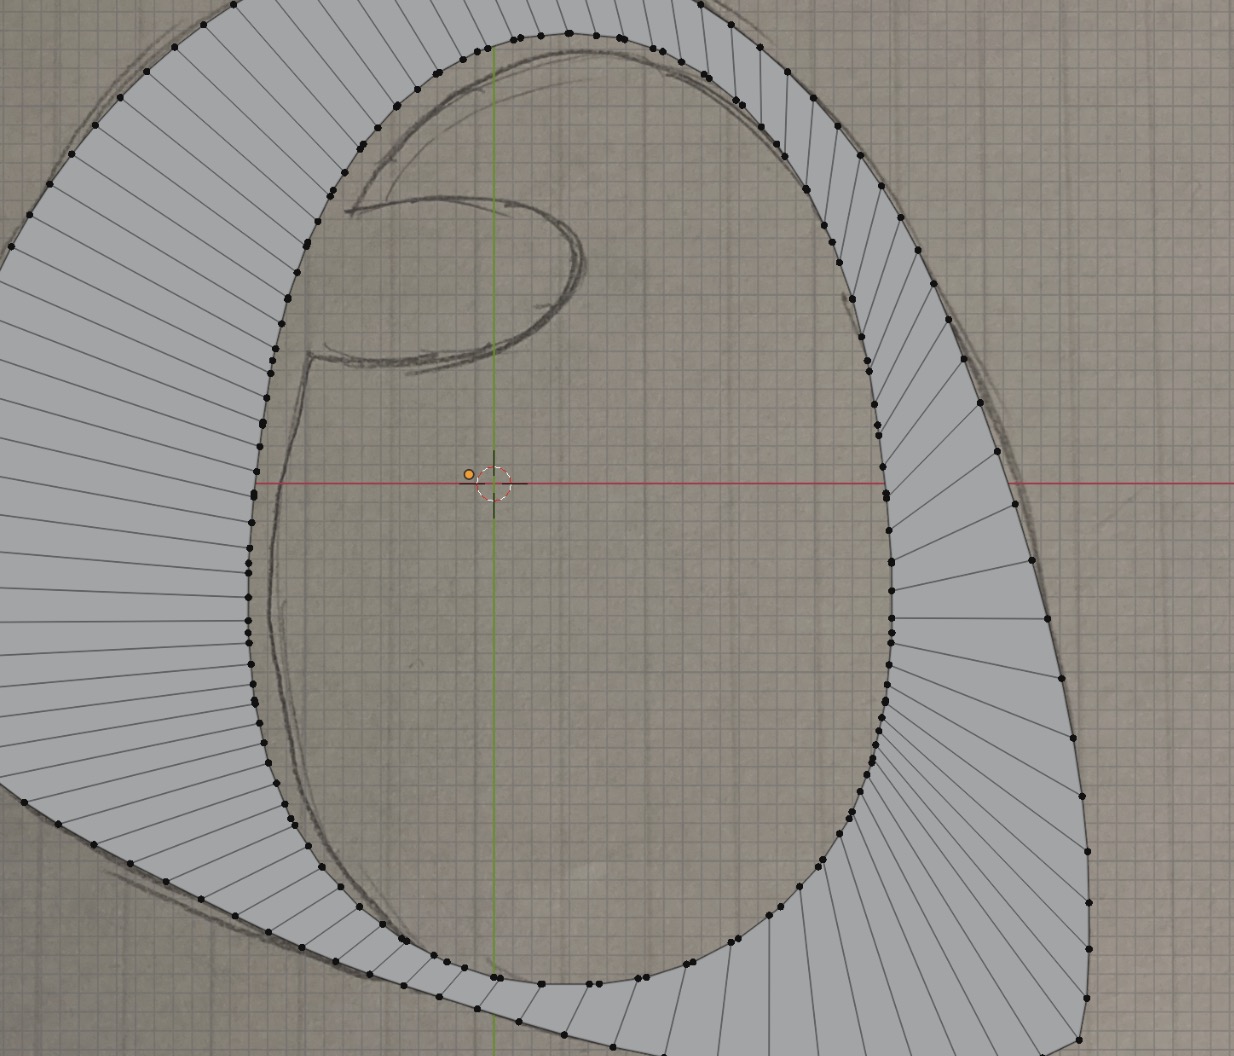
Go back to edit mode. Notice all the extra points that aren't connected to any lines? We have to get rid of those! Shift-click on each one.
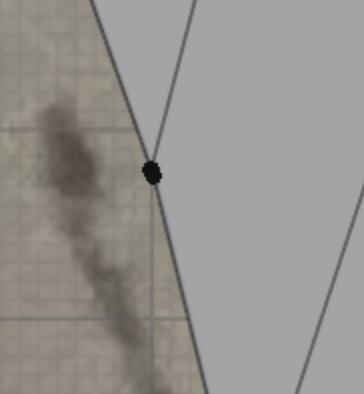
You may come across two points that are very close to each other.
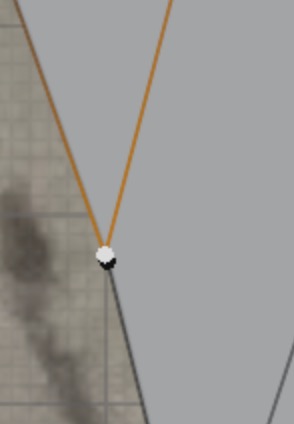
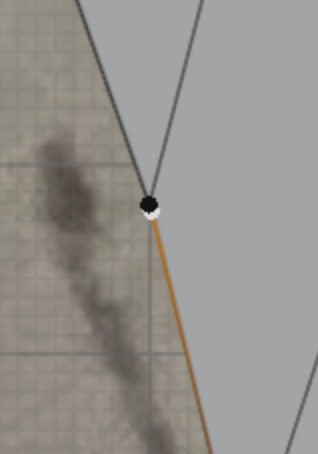
If you click on a point and its orange line looks like this, you've got the right point!
Don't select points that look like this.

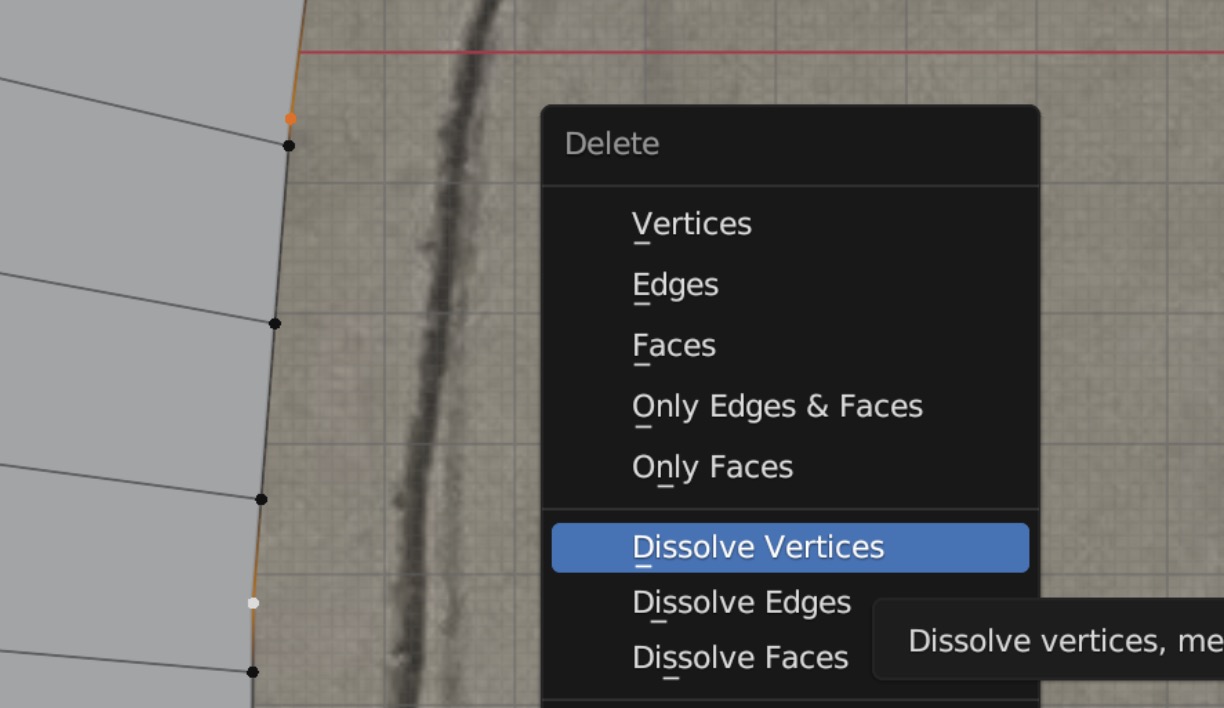
Once you've selected all your points, hit X and click on “Dissolve Vertices”.
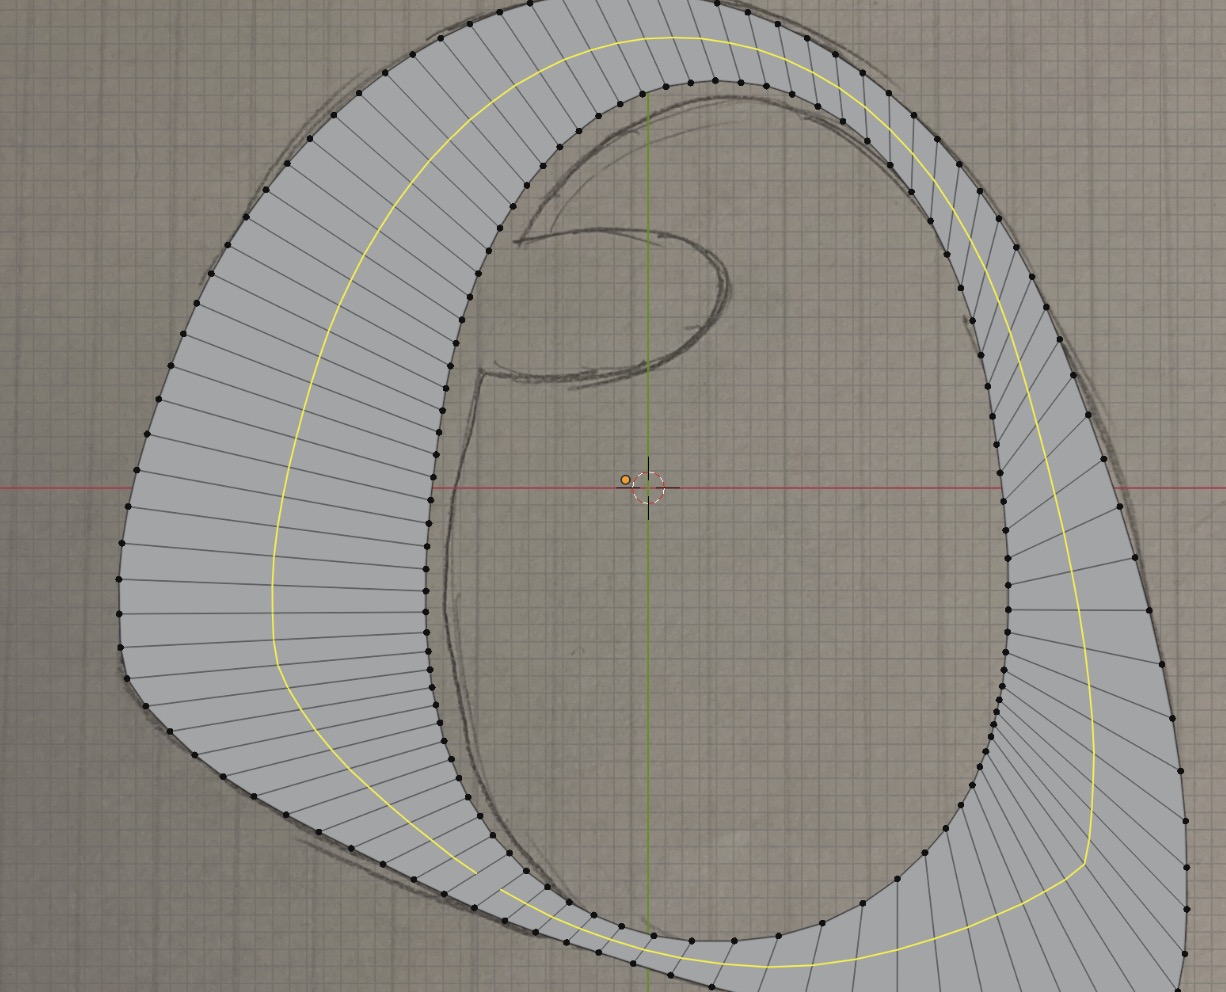
Check your work by clicking on the loop tool and hovering over your mesh.
If you've gotten all the points, the yellow line will be continuous. There's a gap in mine that I missed, so I deleted the extra vertice.
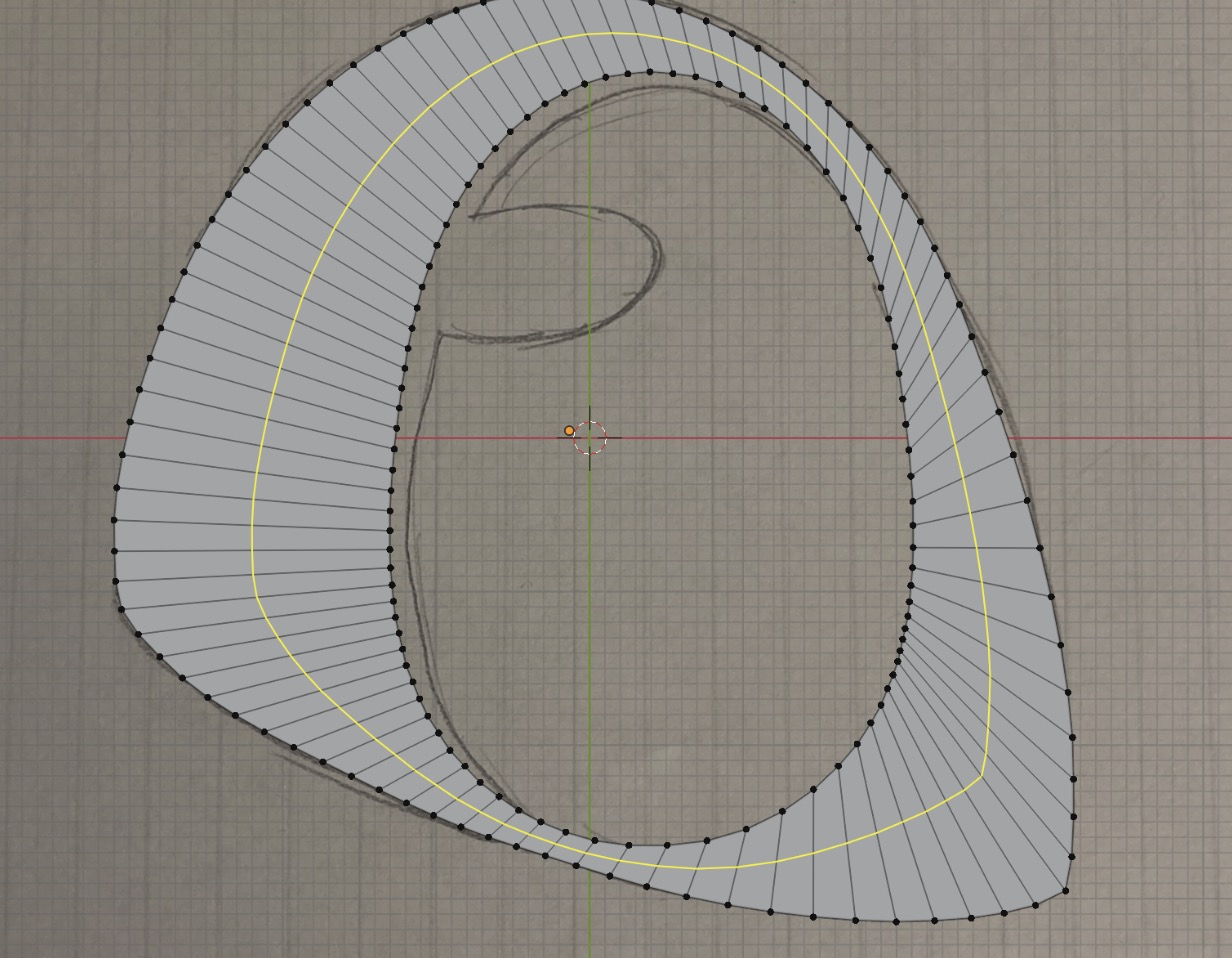
All good! Don't click, instead go back to the select tool (tool on the very top of the list).
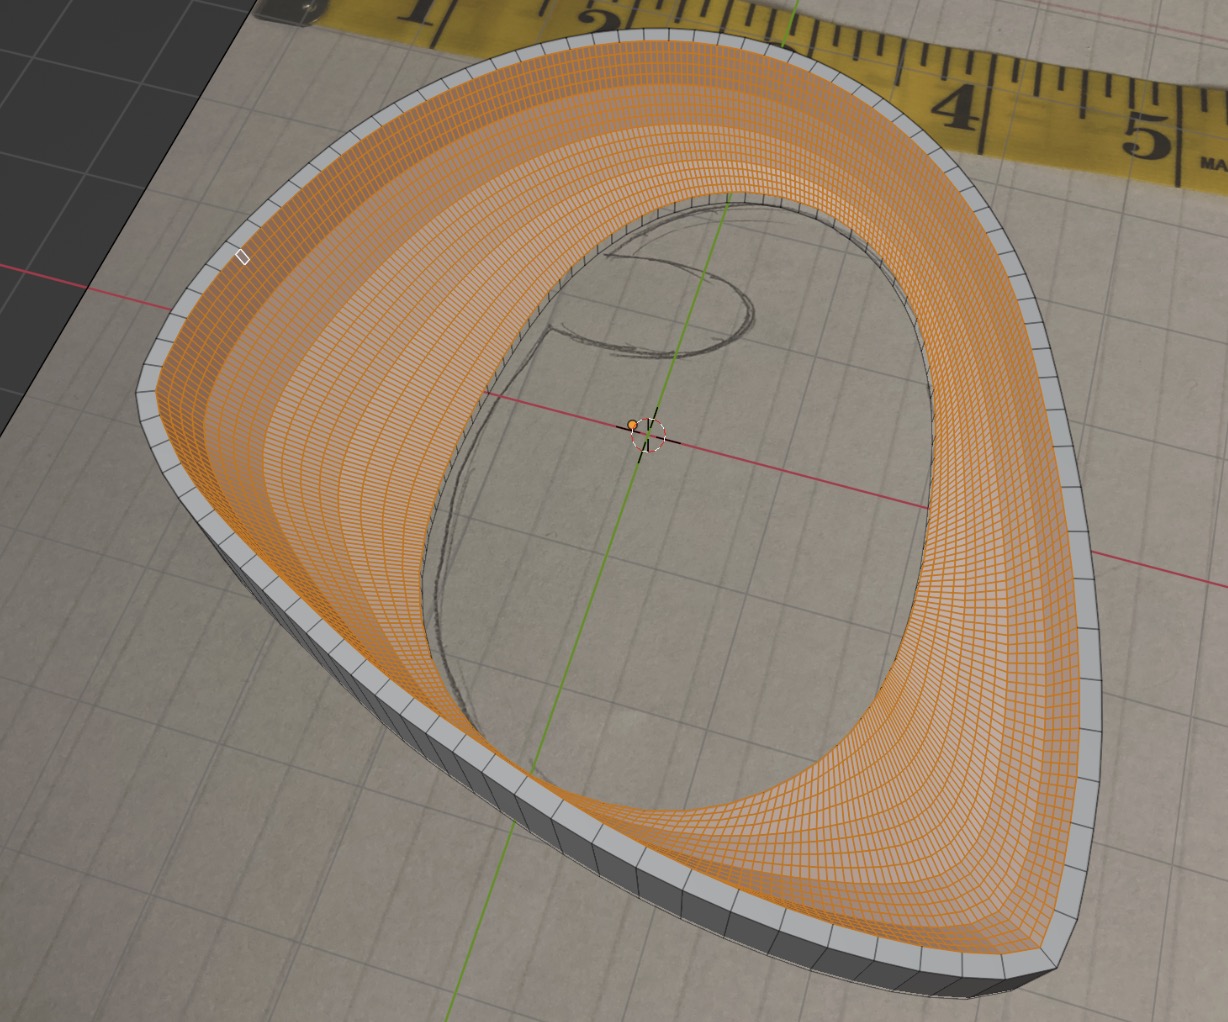
Creating the Walls
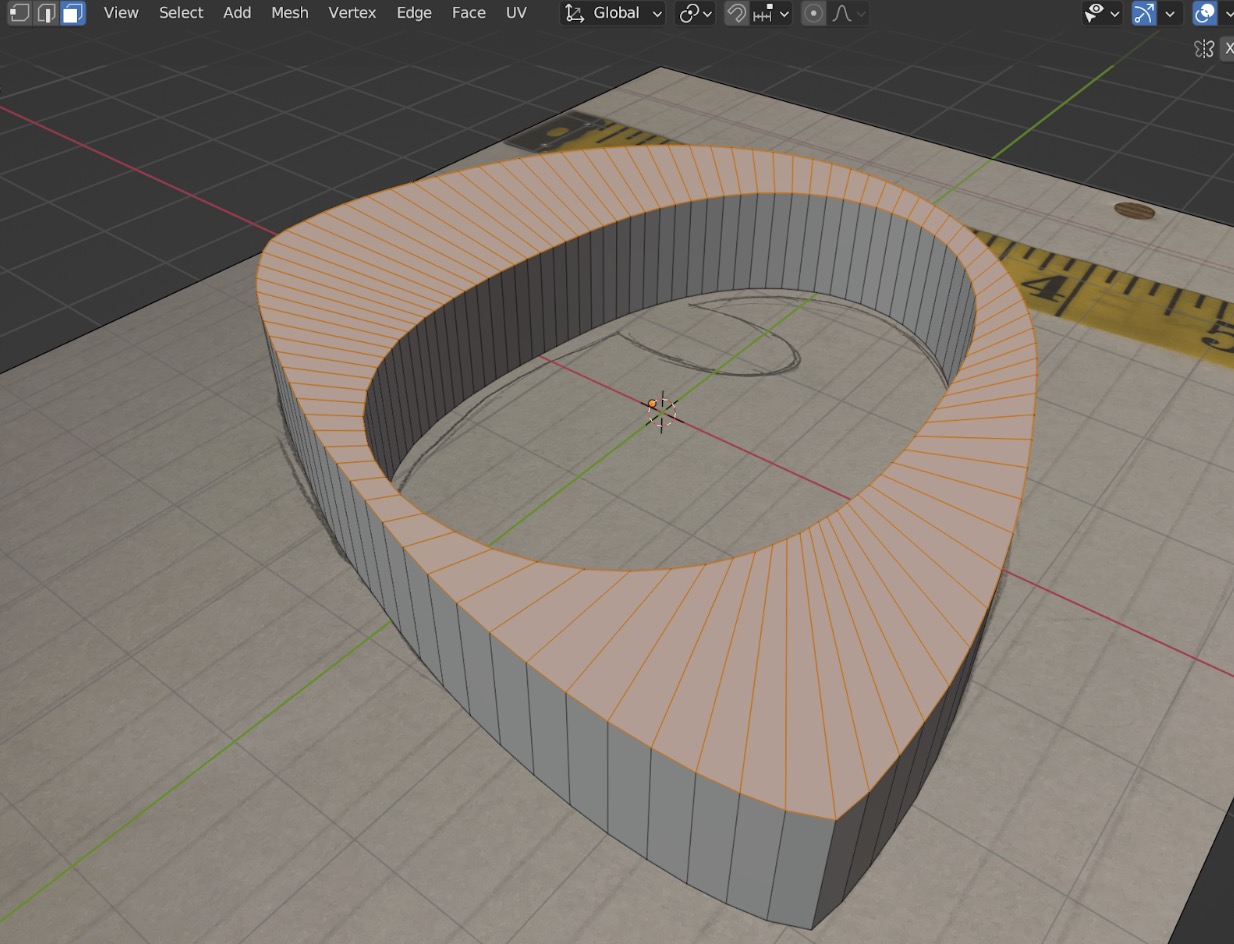
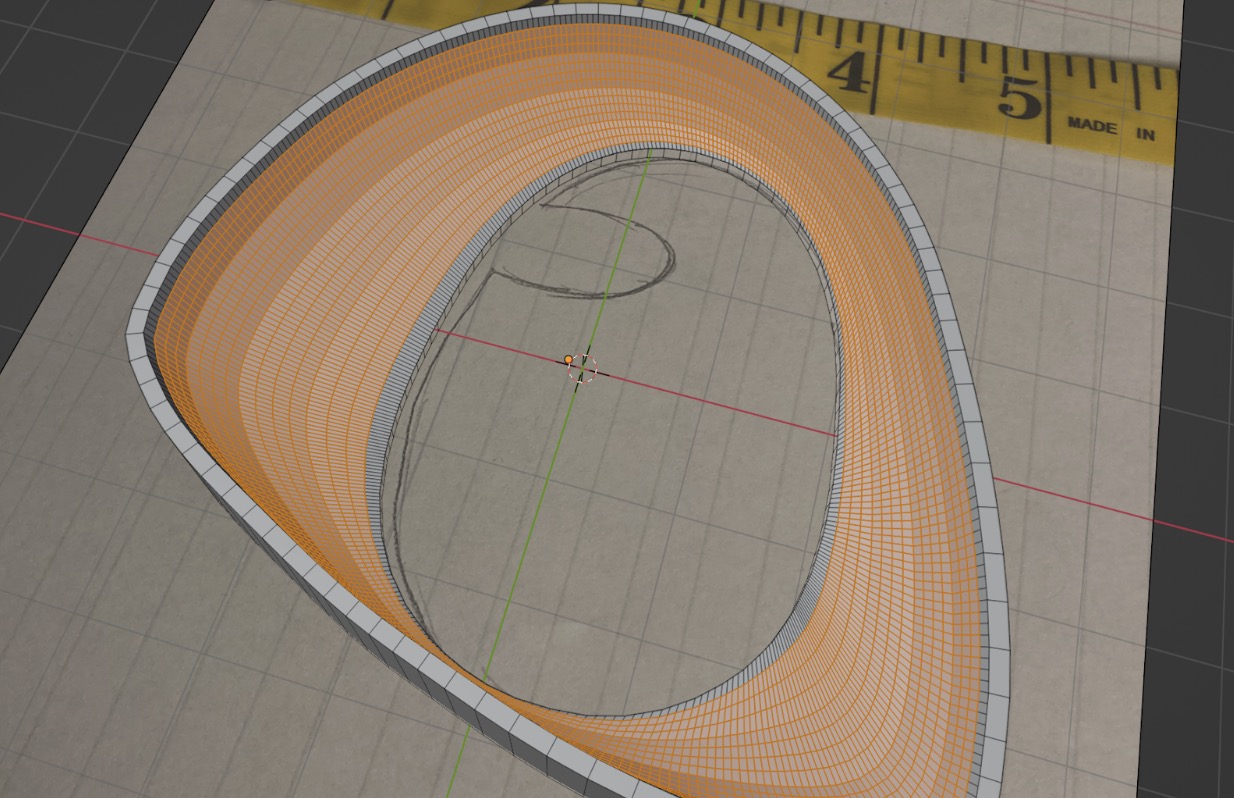
Hit A, then E to extrude upwards. How much you extrude matters here, we are forming the walls of the eye.
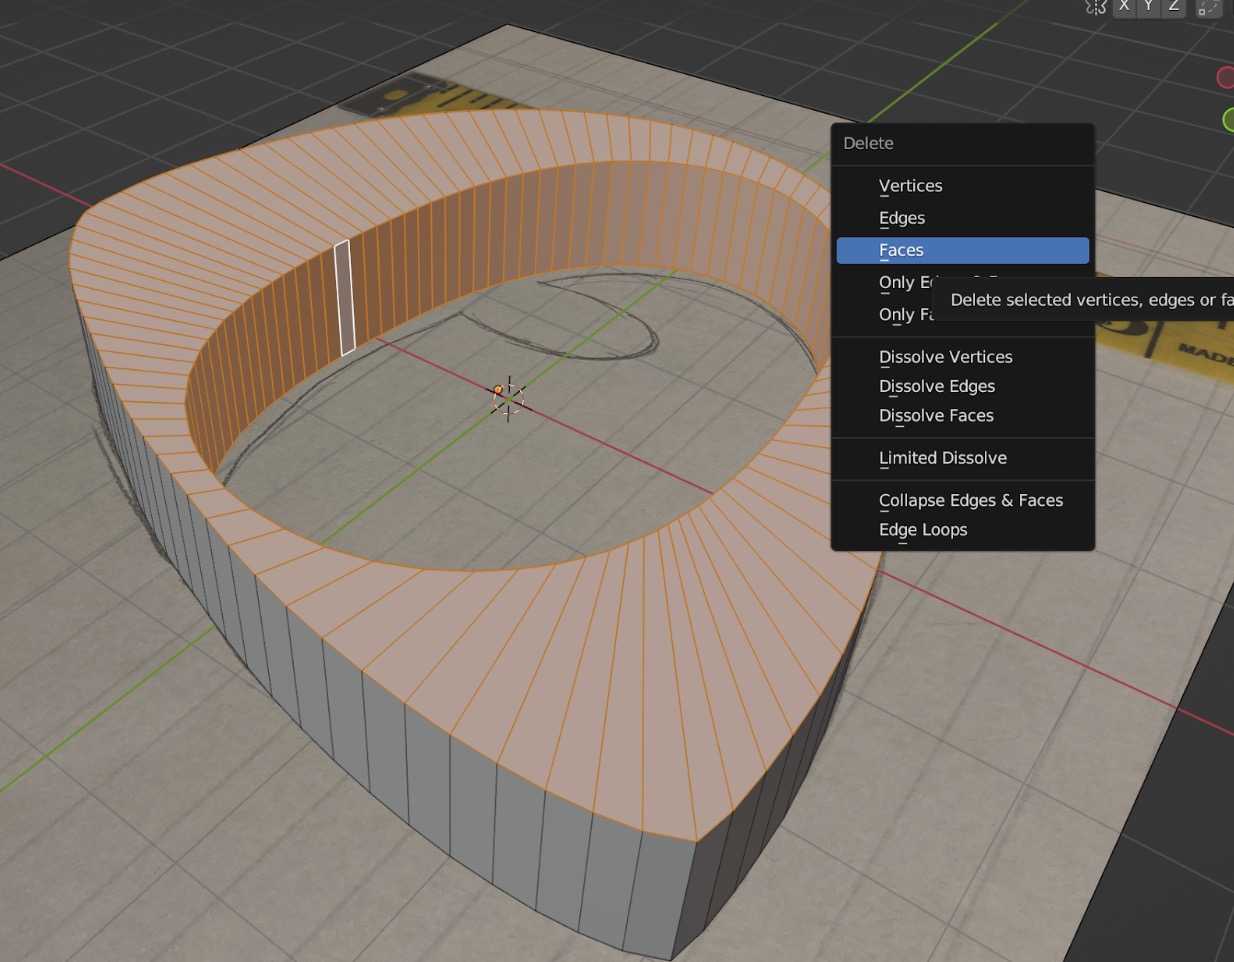
Control-shift click (or option-shift on Mac) the inner wall, then hit X. Delete these faces.
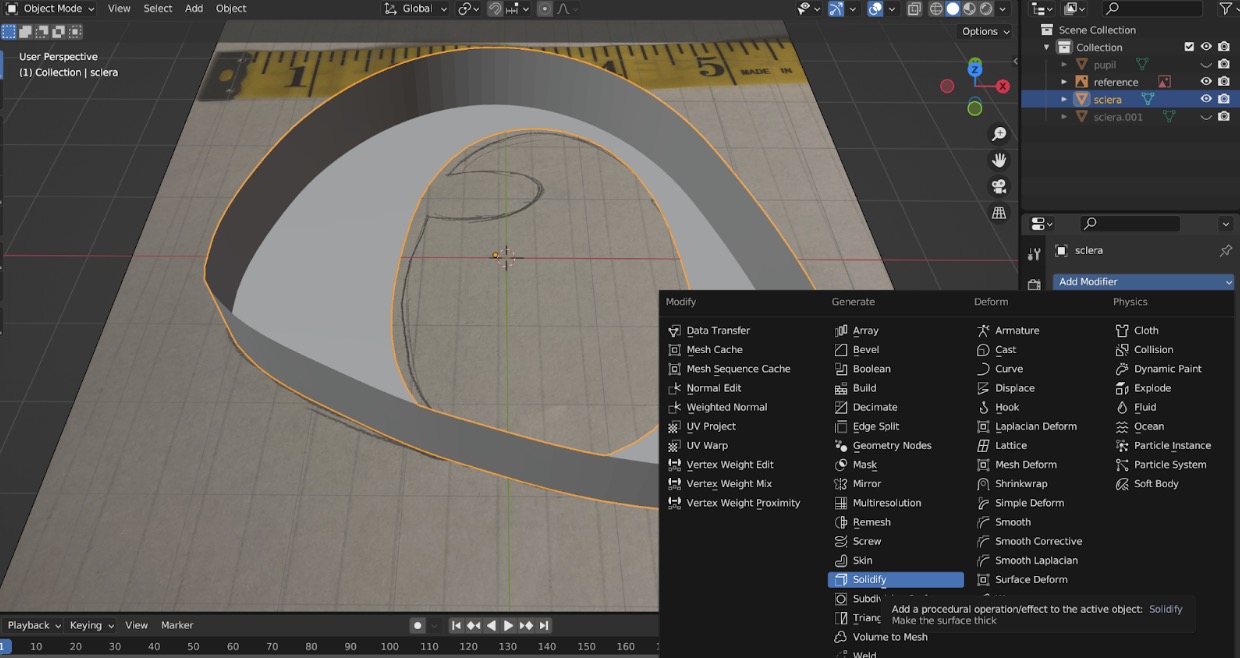
Go back to object mode and add a solidify modifier.
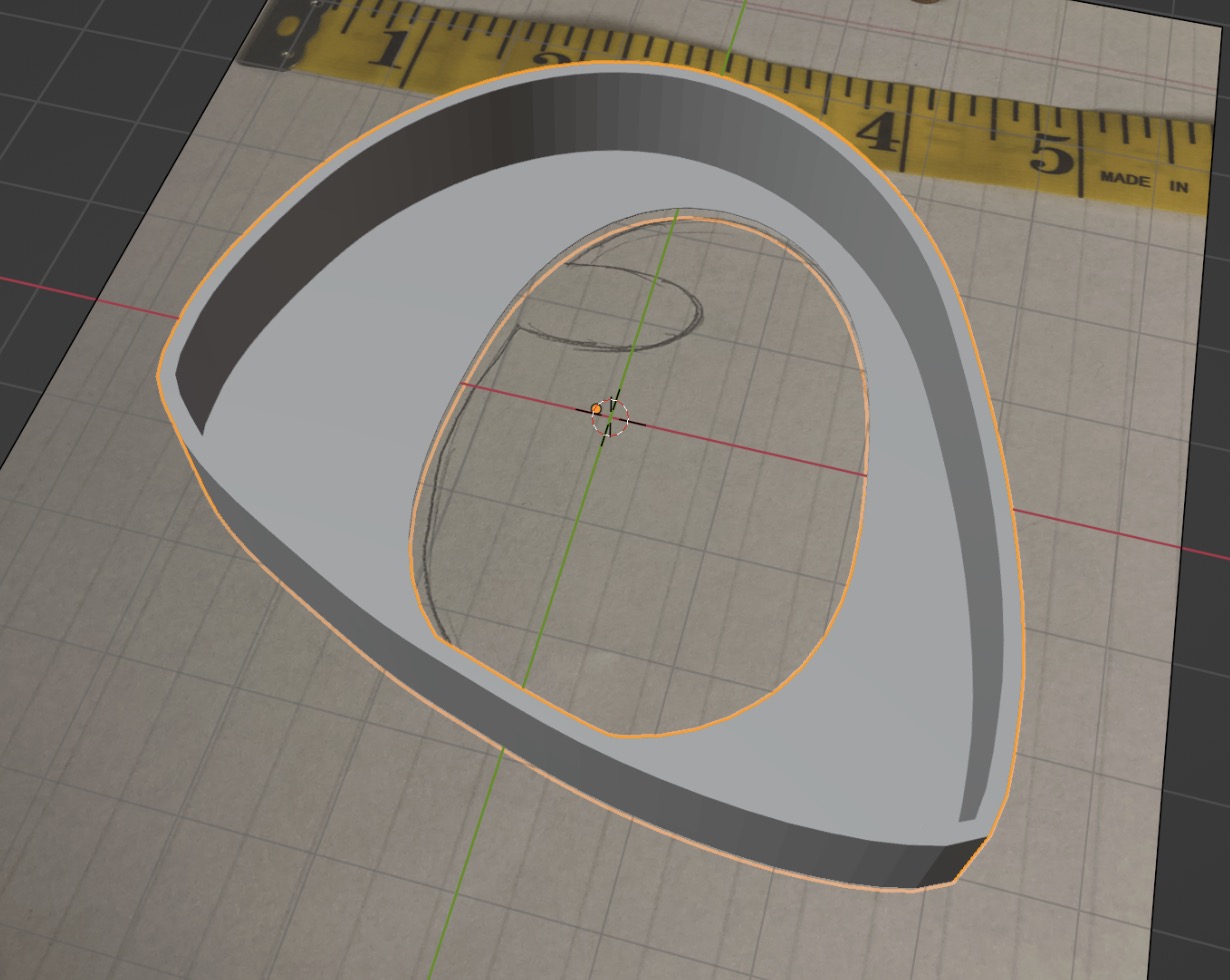
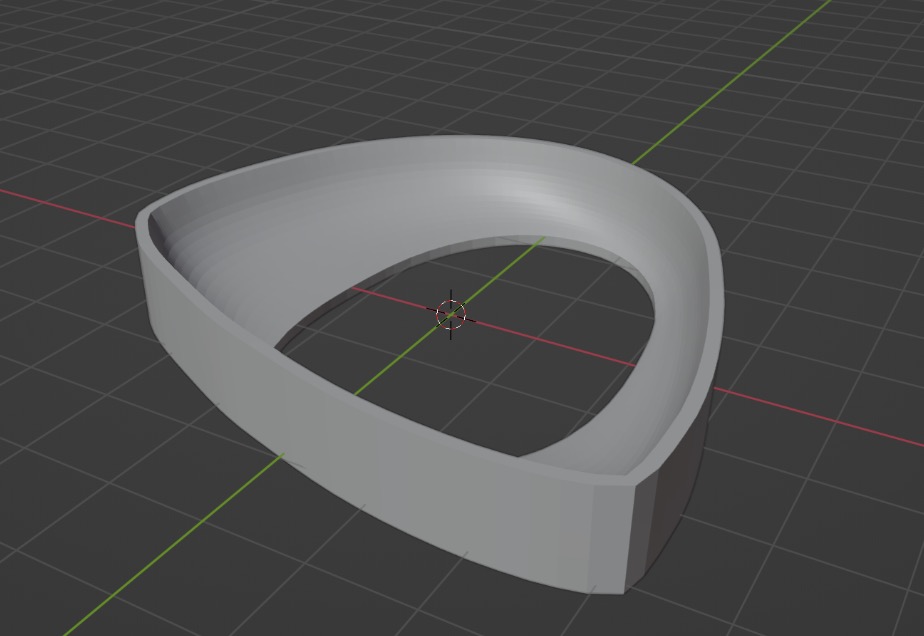
I set mine to about 0.05 mm, then applied it. If you want eyes with vertical walls like these, you're all set! Skip to the scaling part.
Smoothing the walls
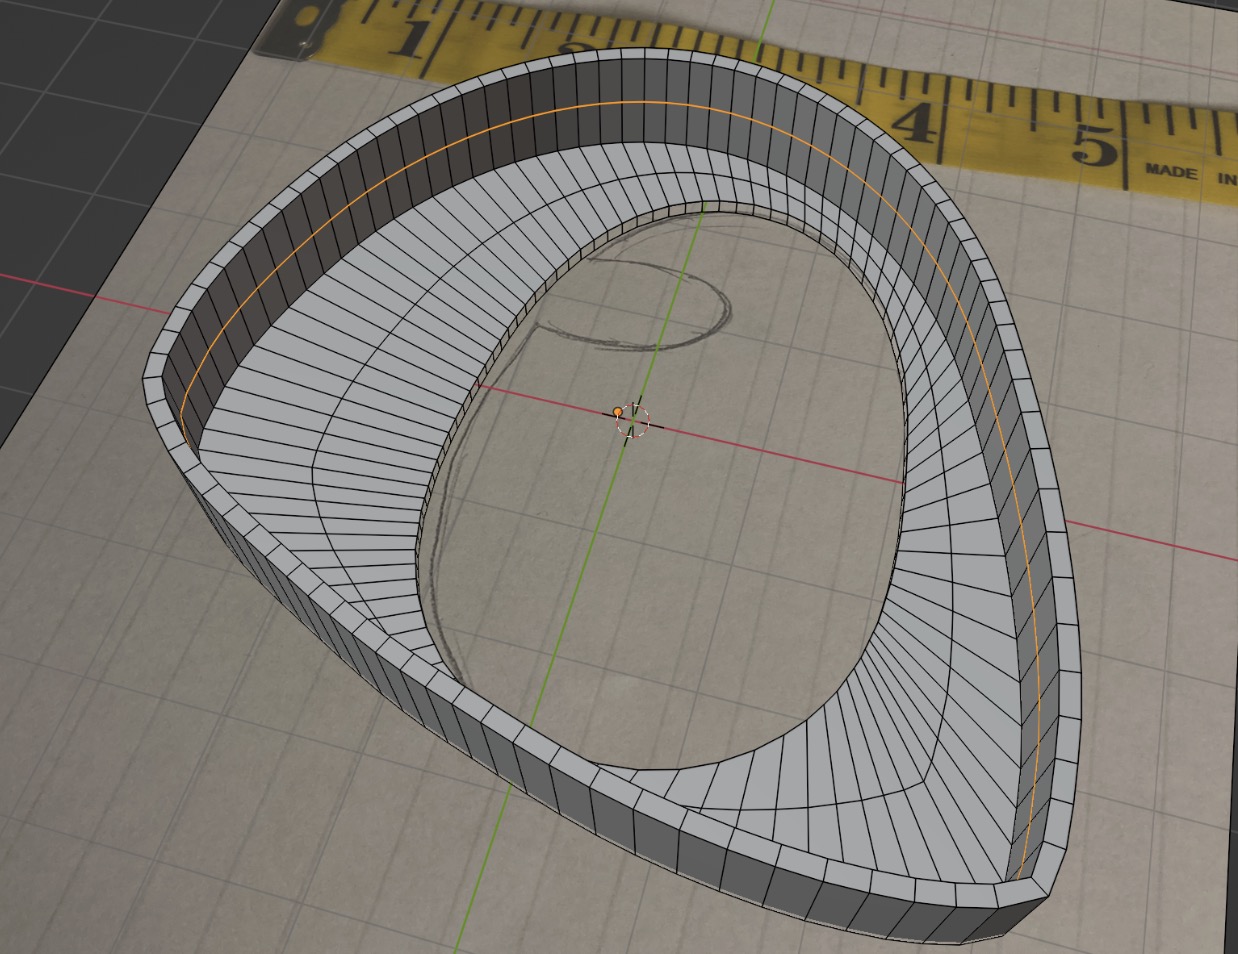
Go to edit mode, and click on the loop tool again. Click on the flat part and the vertical part.
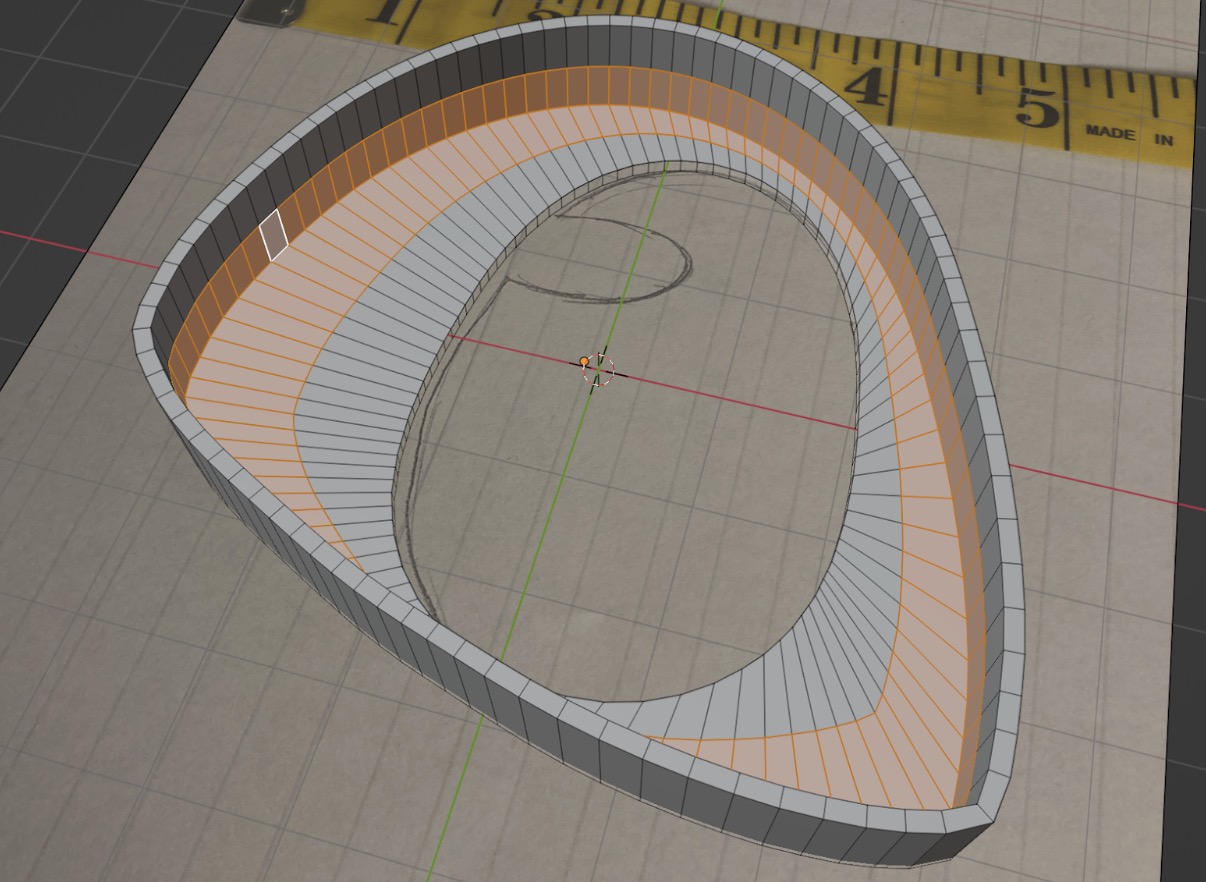
Click on the faces button in the top left corner. Then control-shift click (or option-shift) the two inner walls.

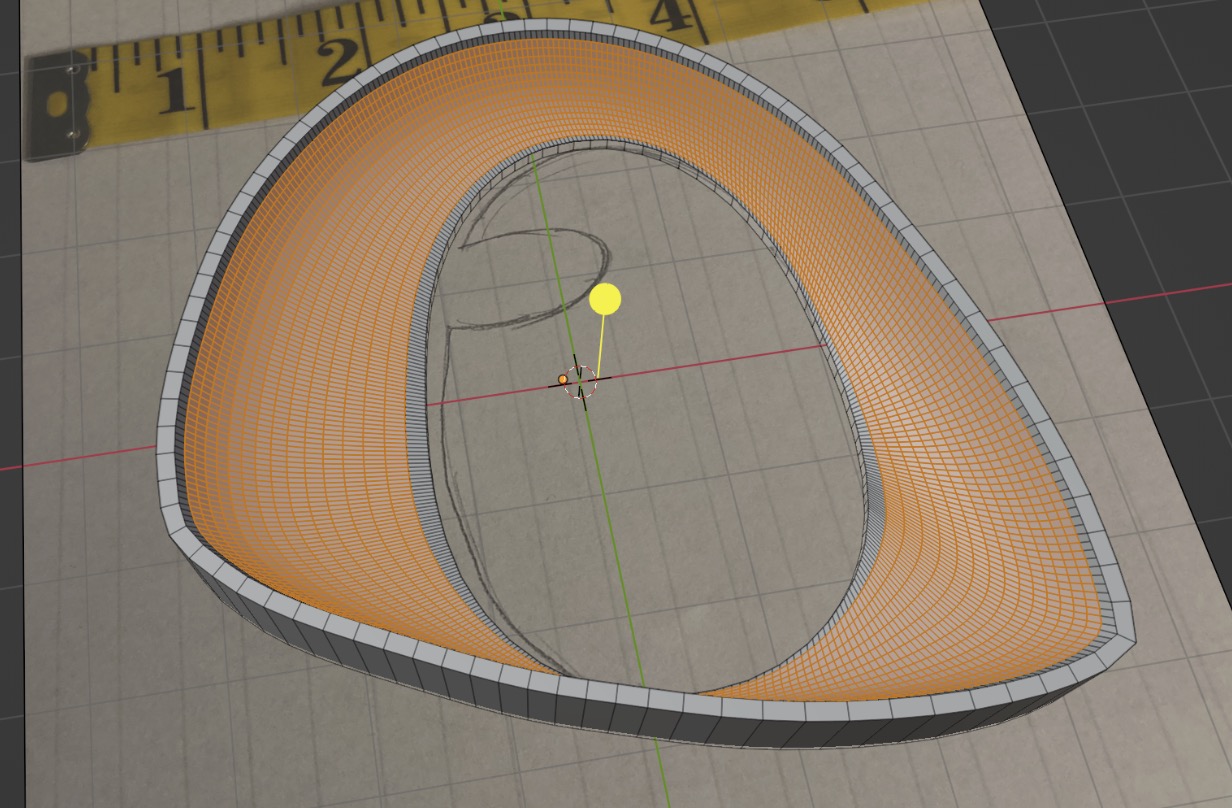
Click on the smooth tool.
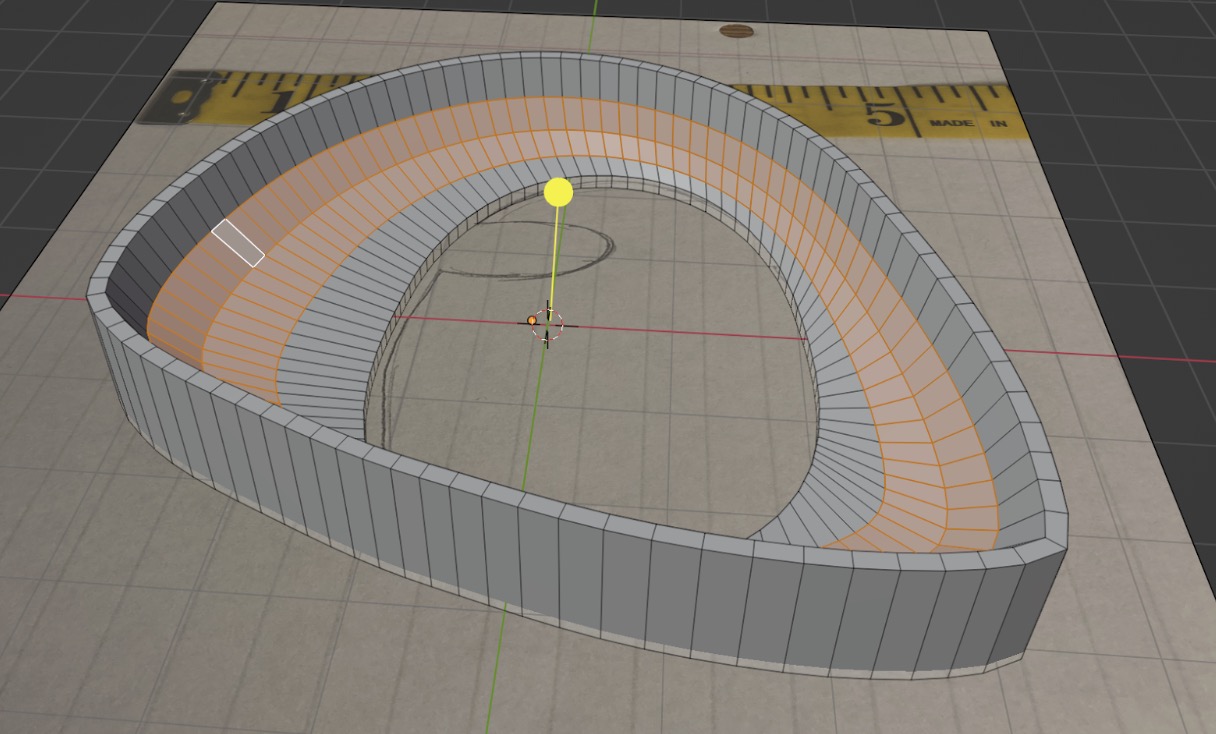
Click on the yellow circle, and drag to the right. This will smooth out the faces.
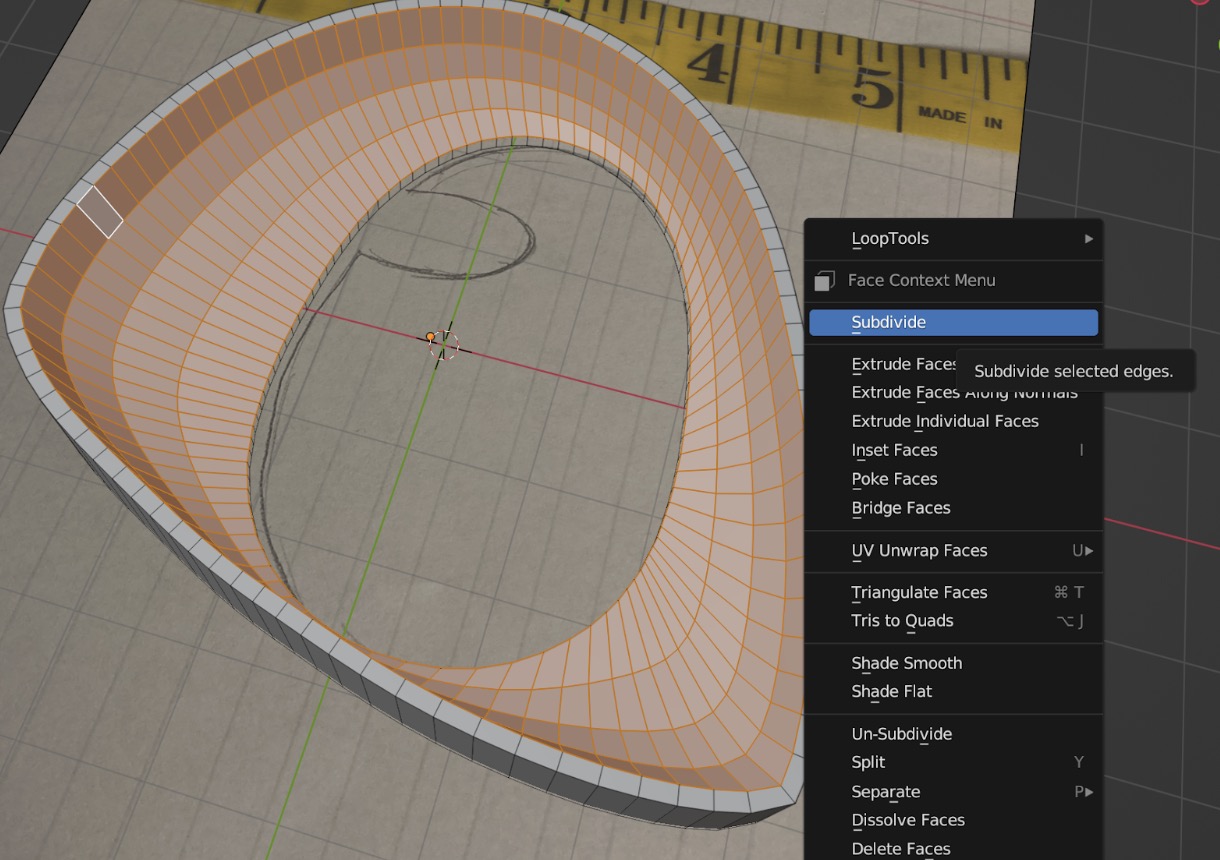
Select all the faces, then right click and hit subdivide.
Subdivide a second time.
Shift-control/shift-option click the outermost edges to deselect them.
Smooth out the faces even more.
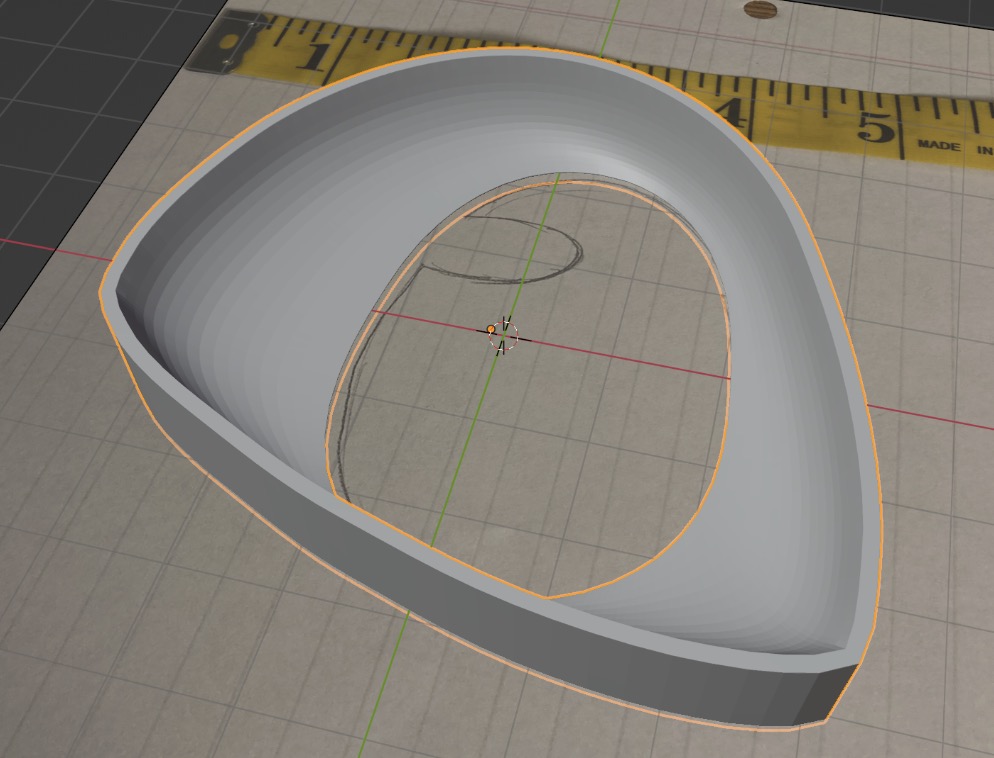
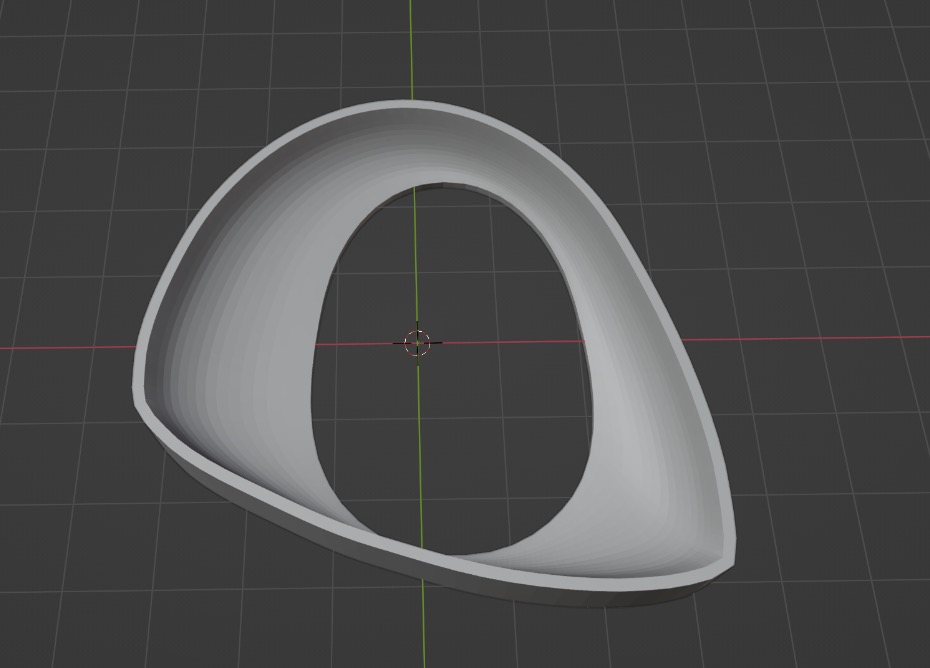
Hit tab to admire your work! Your mesh is done!
Scaling the eye
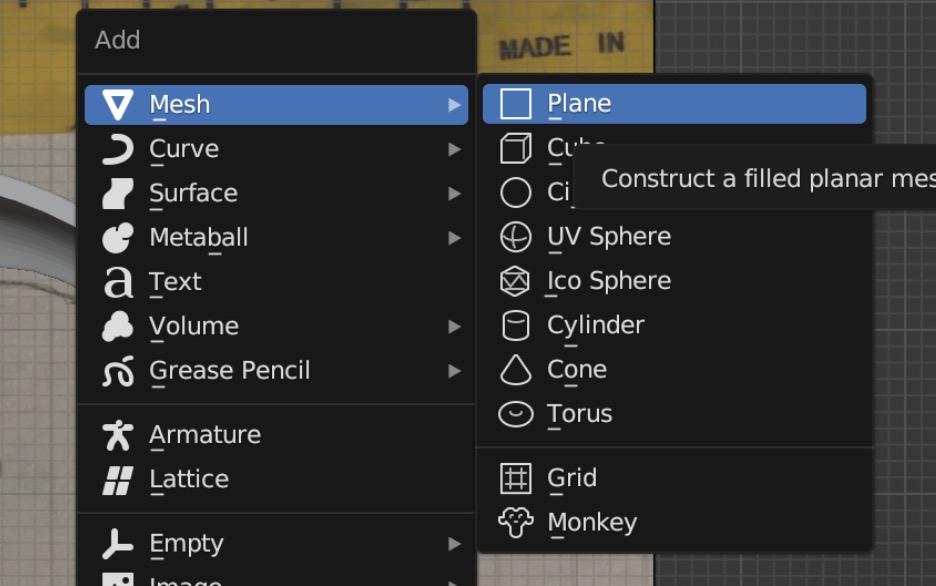
We still need to scale your eye to the correct size. Hit 7 to go into top-down view. Add a plane to the scene.
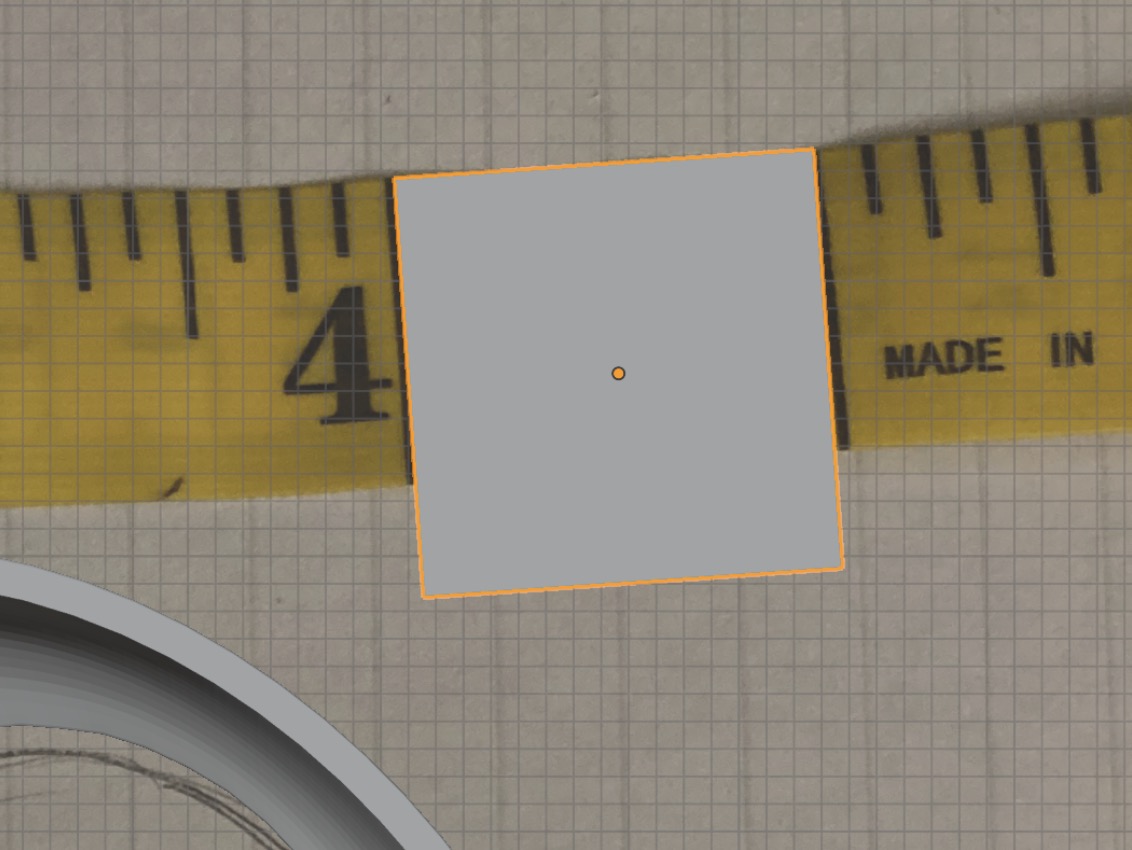
Use S to scale it and R to rotate it to fit your inch/centimeter on your ruler or measuring tape.
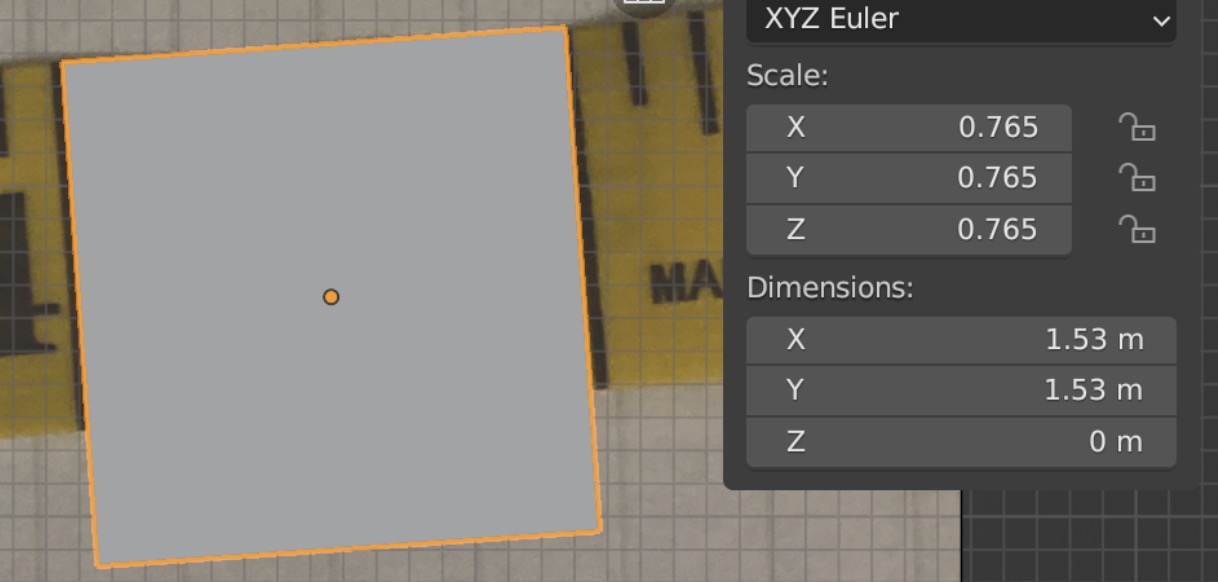
Hit N and look at the dimensions.
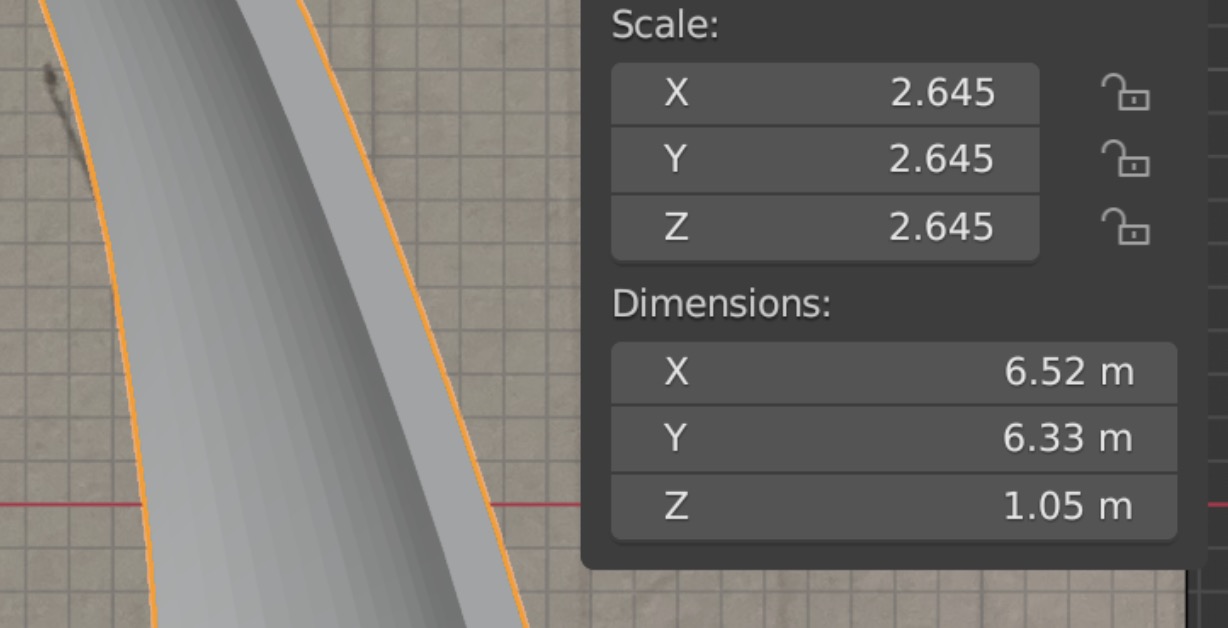
Click on the eye to look at its dimensions too.
This requires a little bit of simple algebra. Set up a proportion, cross-multiply, and divide to solve for x.
1.53/1 = 6.52/x
6.52 = 1.53x
x = 4.26 in or 10.8 cm
This is how big your eye is! Take note for when you 3D print it.
Exporting
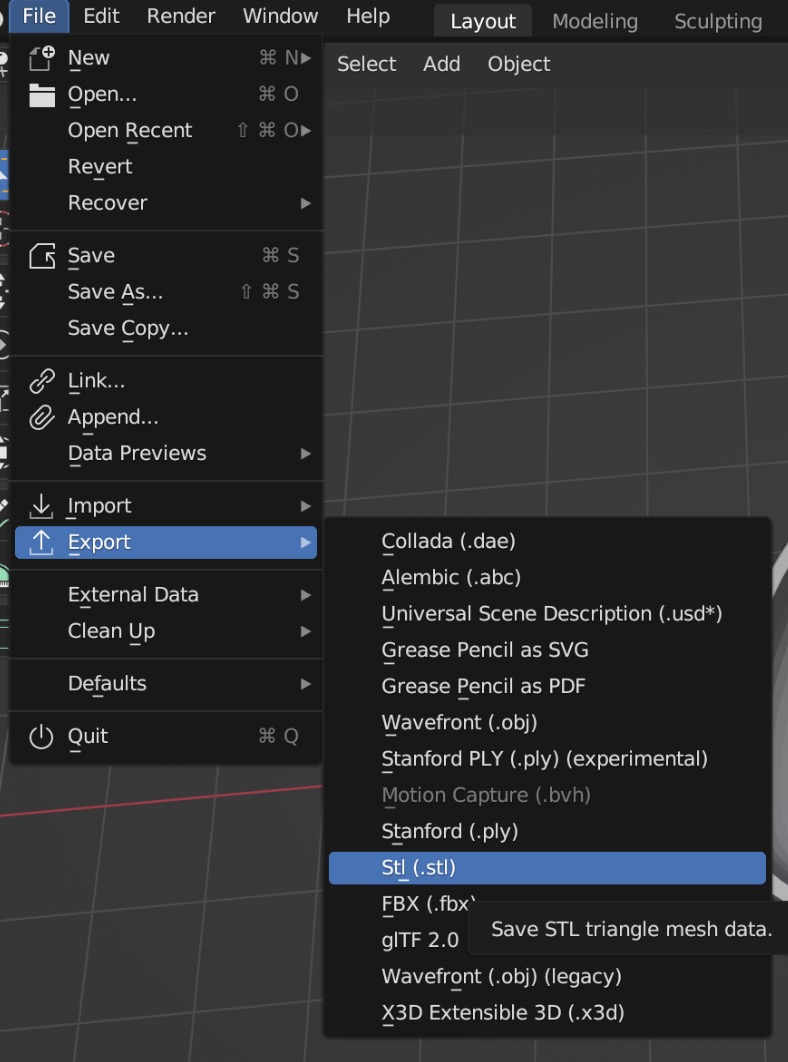
Before exporting, delete all other objects from your scene apart from your model. Then, export it as an .obj or .stl file. To mirror your eye, hit control M, and then hit X. Export one file for the left eye and one file for the right eye. You're done, congrats!
Back to top