Prepping a Headbase
This tutorial will show you how to get a TPU printed fursuit headbase to be "ready to fur". This definition varies from maker to maker, but in my case, I will show you how to do face lining, an adjustable velcro strap system, cheek fluff foam, and ears.Table of Contents
You will need:
- A TPU printed base, with the supports removed
- Neoprene fabric
- Minky fabric (optional)
- Paper towels (optional)
- Duct tape
- Sharpie
- Scissors
- Sewing clips
- Pins
- Velcro
- Cotton print
- Hot glue gun and hot glue sticks
- Thin EVA foam and/or half inch upholstery foam
- Proportional mannequin head
Lining
Lining is the process of placing fabric on top of the raw base to make it more comfortable for the wearer. This is highly recommended due to the rough texture TPU bases tend to have. Wearing a balaclava can be used in place of installing a liner.Before you begin, test the fit of your base. Is it big enough? If you wear glasses, is there enough clearance? If the base sits too close to your eyes, you may want to cut a small square of upholstery foam and glue it into the base. Mine was fine and my client does not wear glasses, so I moved onto the next step, patterning the lining.
If your muzzle is hollow past where the mouth opening is, and you are not intending to use nostrils as ventilation, you will need to fill in the extra space with upholstery foam. This will simplify the muzzle shape and make it significantly easier to line. Cut out a piece of upholstery foam and stick it inside the muzzle, right past where the mouth opening begins. Glue it down. This will serve as a wall to block the rest of the muzzle.
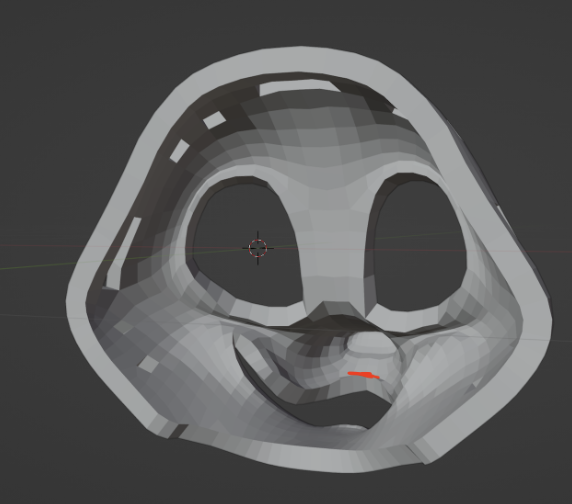
For example, on this raccoon base, I would add foam on the interior of the mouth from the red line out to the nose. This will make it significantly easier to pattern and glue down the mouth liner later.
Cover half of the interior of the base with duct tape, making sure to give clearance for the straps. We use duct tape to create a pattern on the surface of the object. Once removed, it becomes a guideline for sewing. In this case, the head itself is symmetrical so only half of the interior will be patterned in this way. Using duct tape takes a lot of the guesswork out and makes a well-fitting pattern as the pattern is taken right from the object itself. We will be using this method to create the fur pattern later on!
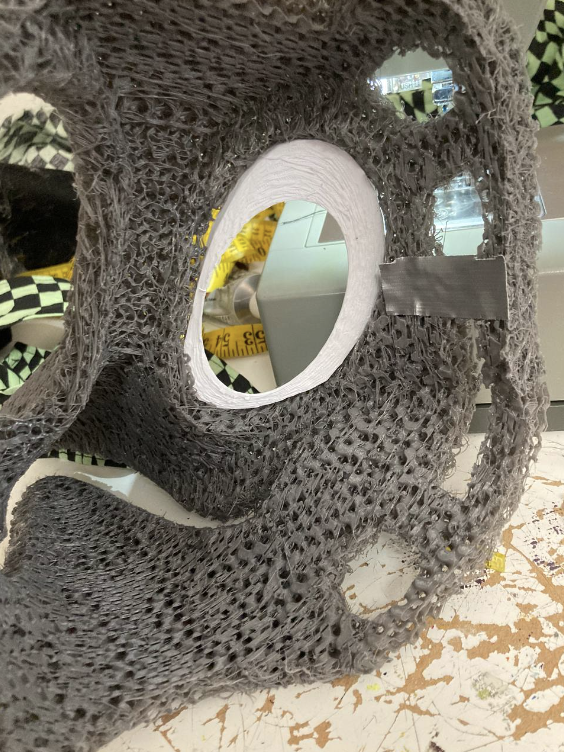
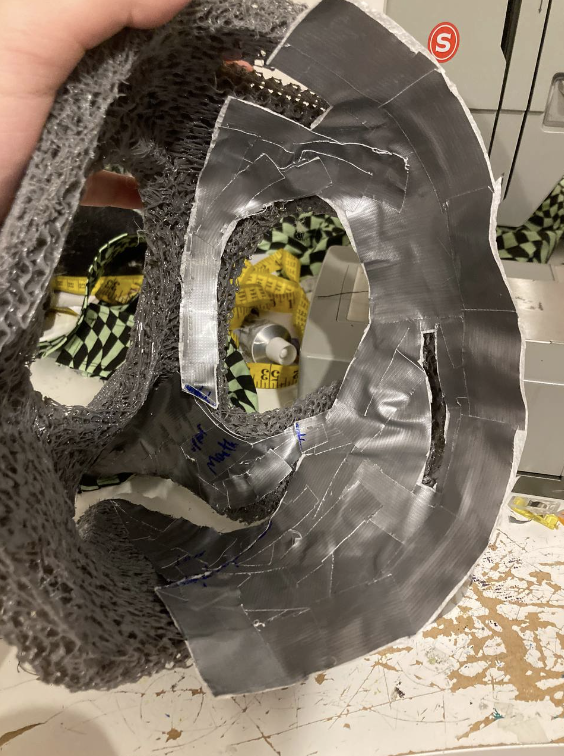
Section off the mouth areas from the rest of the lining, and label each piece with a Sharpie. Add alignment marks over each line to help with puzzling the pieces back together. If you are using particularly sticky tape like I was, lay your pieces flat onto a paper towel. The paper towel makes the pieces a lot easier to deal with and prevents tape residue from getting on the fabric.
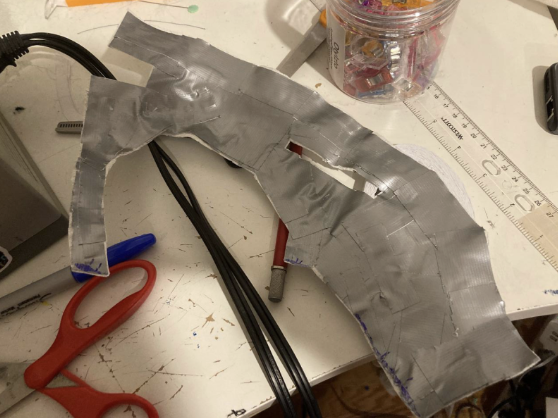
If your pieces do not lie flat, you will need to either splice them into two smaller pieces, or cut darts. A dart is a singular cut made in a piece to make it lie flat. Although it resembles a triangle, do not cut out a triangle yourself, just cut one line! The triangle is formed by the pattern piece splitting open.
Cut your main liner pieces out of Neoprene with a border for seam allowance. You may either trace the pieces onto the fabric and cut, or hold the pieces in place with sewing clips or pins and then cut.
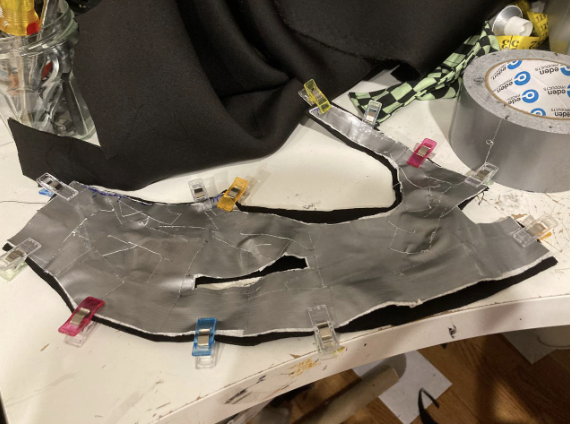
For the mouth pieces, fold the fabric in half and cut it out with respect to the symmetry line. Usually I use minky for this, but because I am making a bird with a minky beak, I opted to use Neoprene instead. You should be able to make your lower mouth piece symmetrical, though do note that a seam in the upper mouth may be necessary depending on how much curvature there is.
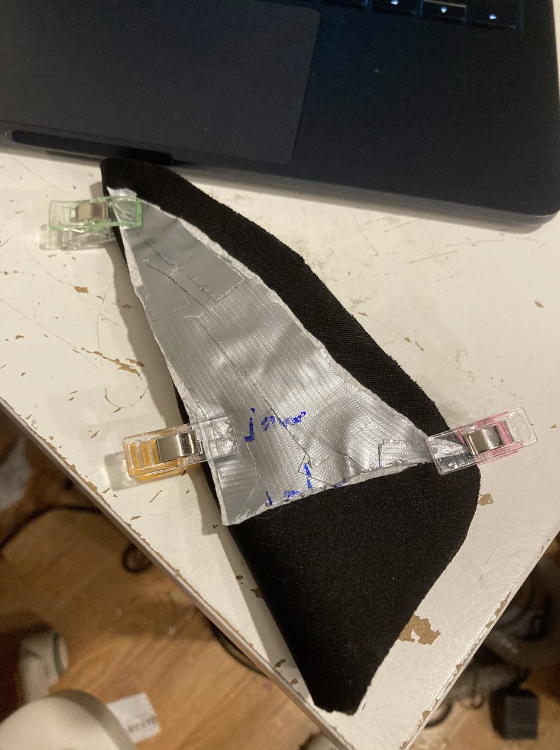
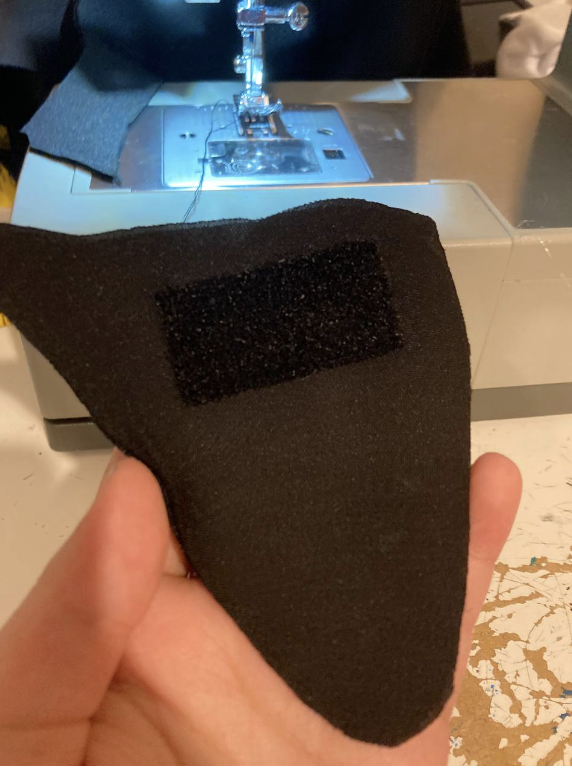
If you would like to have a removable Velcro tongue, cut out a piece of fuzzy Velcro and secure it onto the lower mouth with a dabble of hot glue. Sew around the edge, either by hand or machine.
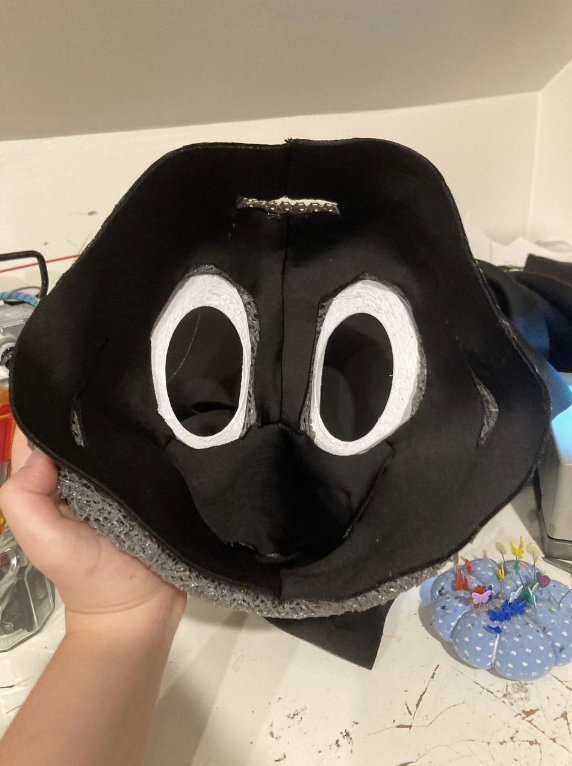
Sew all the pieces together. Refer back to the pattern if you are confused, paying close attention to the alignment marks. Pin the liner onto the base, using the holes for the straps to help guide you.
Hot glue the liner down, in this case I started with the lower mouth. You don't have to put hot glue everywhere, just enough to hold the liner down securely. Remove the pins as you go. I purposefully left a bit of clearance for the eyes that I'll cover up later, but otherwise I think my lining is pretty clean! Don't worry if yours isn't perfect, no one will see it except for you or the wearer.
Making the Velcro Straps
Pre-wash some cotton fabric with cold water on a gentle cycle. This will pre-shrink the fabric to prevent shrinking issues in the future.Measure the strap holes on your base. Mine were about 7 cm long, so I decided I would make my straps about 6-6.5 cm wide.
Cut off the frayed edge of your cotton print. Measure a rectangle that is double the width you want your straps to be, and on the yard-long edge. I folded mine in half to help me cut.
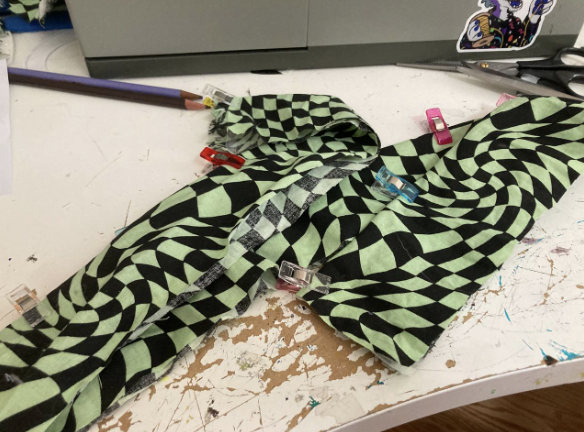
With the "pretty side" on the inside, sew along the open edge of the long rectangle. This is easiest with a sewing machine.
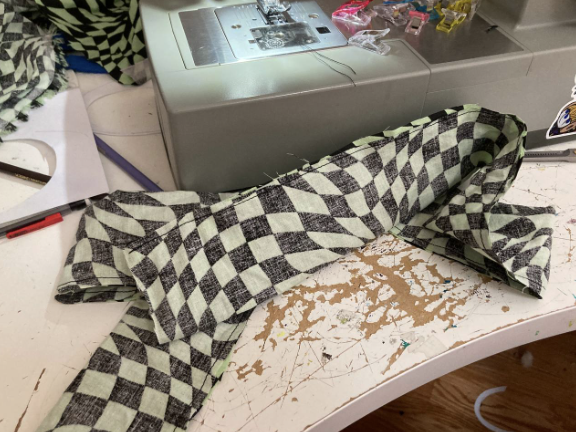
Turn it inside out so the "pretty side" is on the outside, pin or clip to hold everything in place, then sew along the edges. Not only is this to secure the straps to prevent them from wrinkling and shifting around, but it also looks pretty!
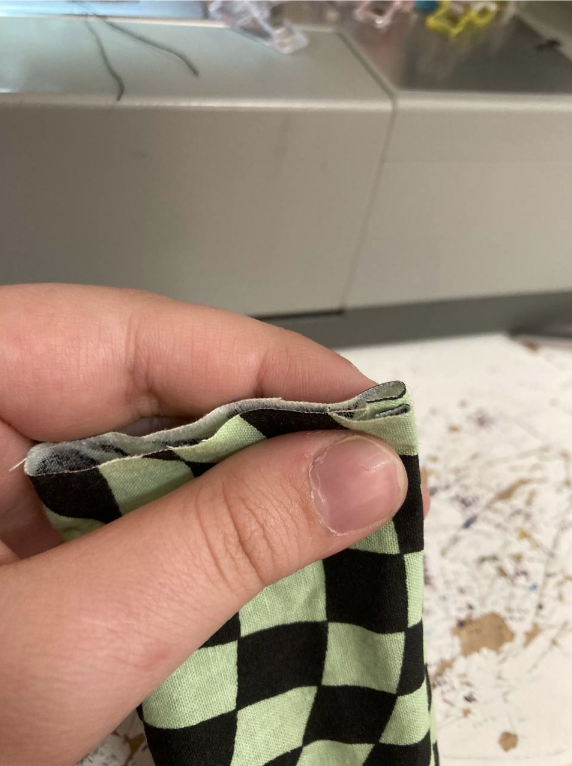
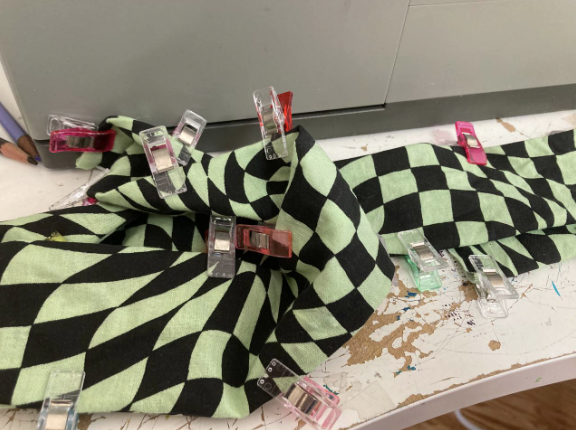
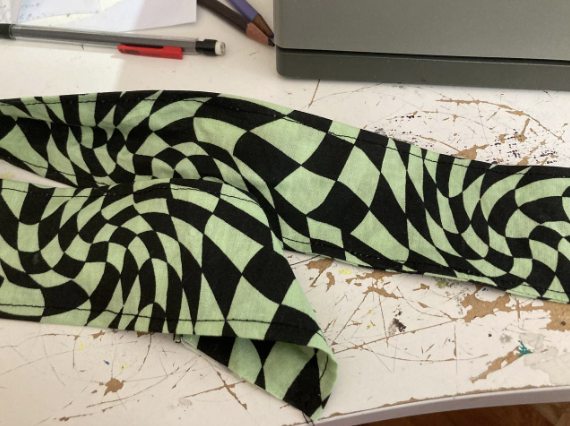
You will now have one big strap, but you need three. Feed the big strap through the slots on the side of the head, to get a sense of placement. Feed your measuring tape through the top slot, and loop it over itself. You can use a clip to hold it in place.
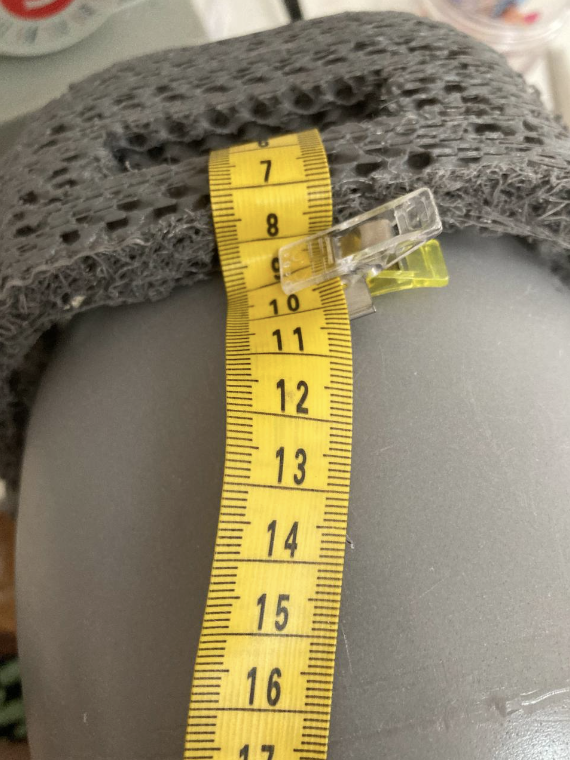
Measure to where your big strap is, then use that measurement to cut a portion from it. This portion will become the top strap. Take the rest of the big strap, fold it in half, and cut. These will be the side straps.
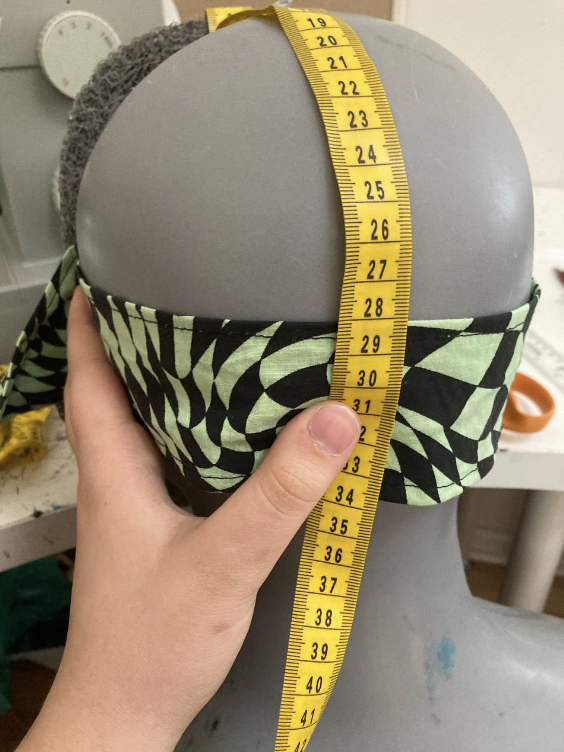
Hem each edge by folding over twice and sewing it down. This will prevent fraying.
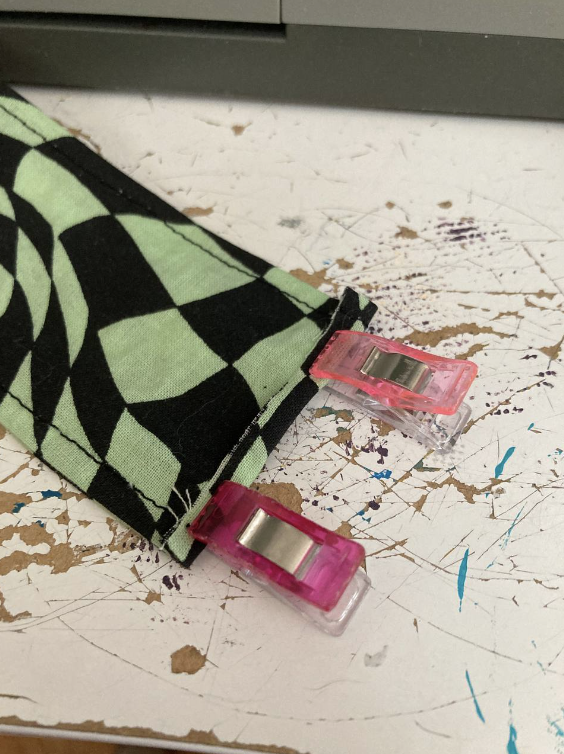
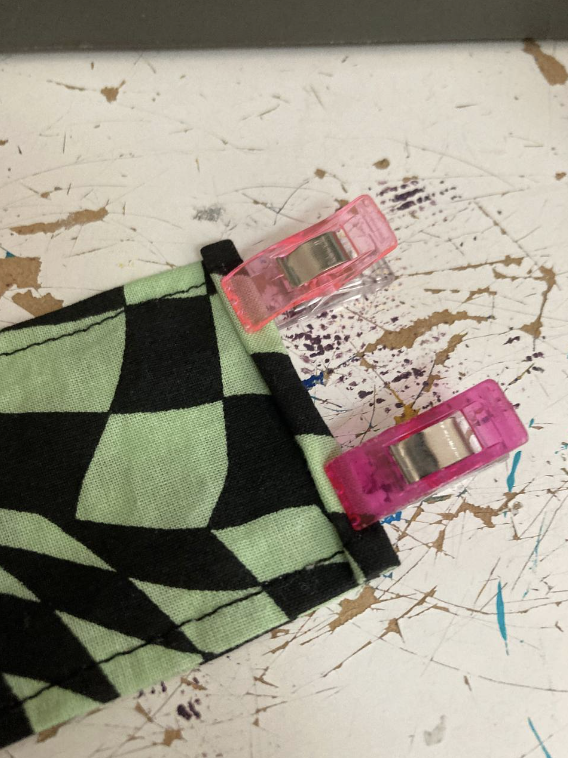
Time for Velcro! We want the rough Velcro to face *outwards* - away from the wearer - so it does not get caught in their hair. This takes a little bit of careful planning to get right.
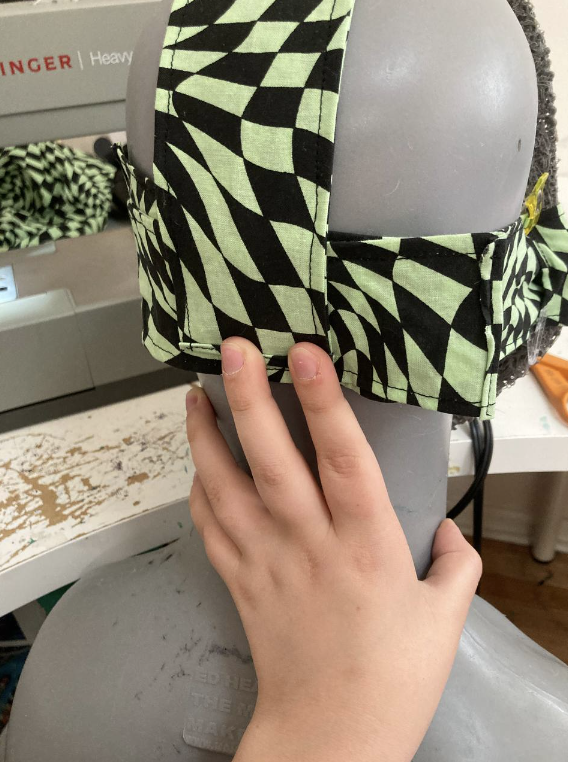
On the left strap, facing outwards, place a rectangle of rough Velcro.
On the right strap, place a rectangle of fuzzy Velcro facing inwards and rough Velcro facing outwards.
On the top strap, place a rectangle of fuzzy Velcro facing inwards.
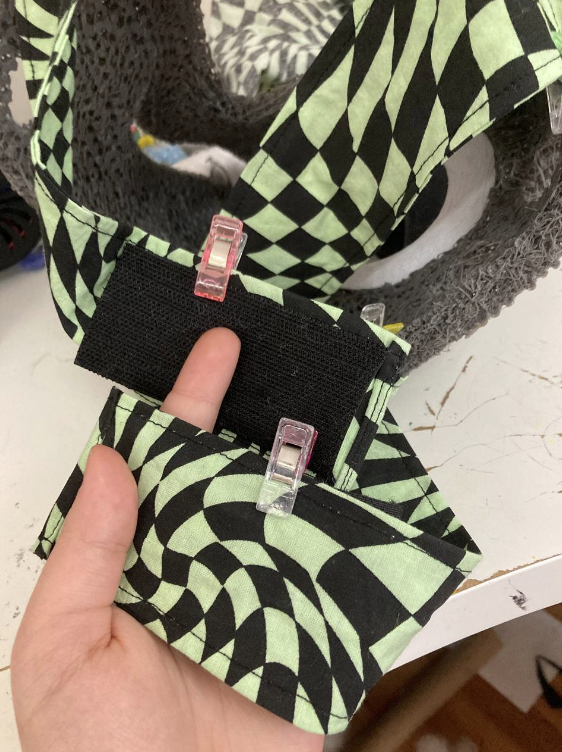
Pin or clip your Velcro and test out the system first before securing it. Use clips near the slits on the base to hold the straps in place at the loop.
To secure them, use a bit of hot glue to hold the Velcro in place and then sew around the edge. Try on the base and see how it feels.
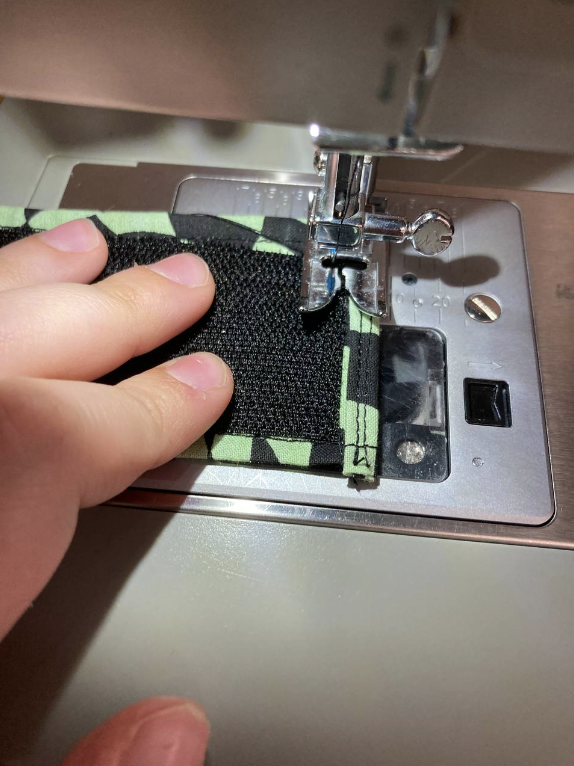
To install the straps themselves, handsew them to the liner. I used a blanket stitch.
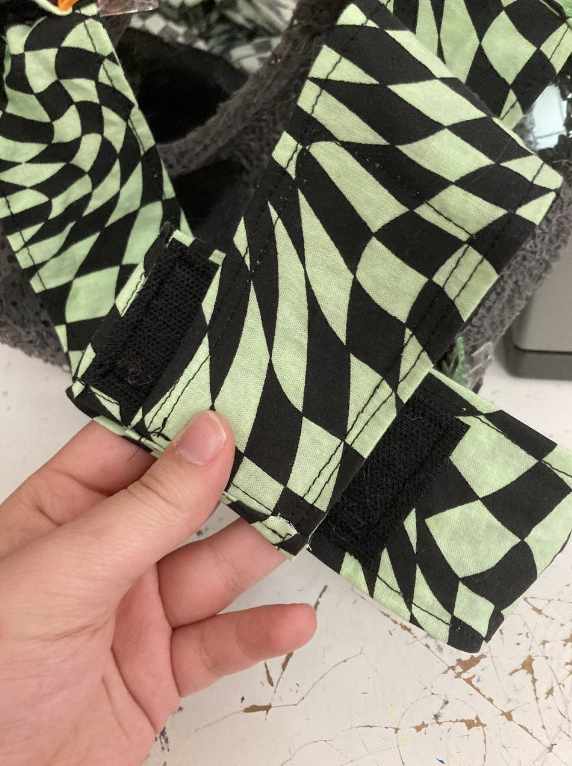
Your adjustable strap system is now ready to go!
Cheek Fluff Foam and Ears
Cheek fluff foam provides structure for protruding cheek fluff to sit on top of, it is an optional stylistic choice.A cheek fluff foam pattern is just one piece, but it may take a couple of tries to get right. The side that touches the base will be curved, and the side that faces outwards can either be pointed or rounded. You can make it bottom heavy if preferred, with the point on the lower end. Keep in mind that fur will make these protrusions larger.
Hold it up and/or pin it to your fursuit base. It may take some fiddling to get the placement right. Once you're happy with it, cut two pieces out of half inch upholstery foam.
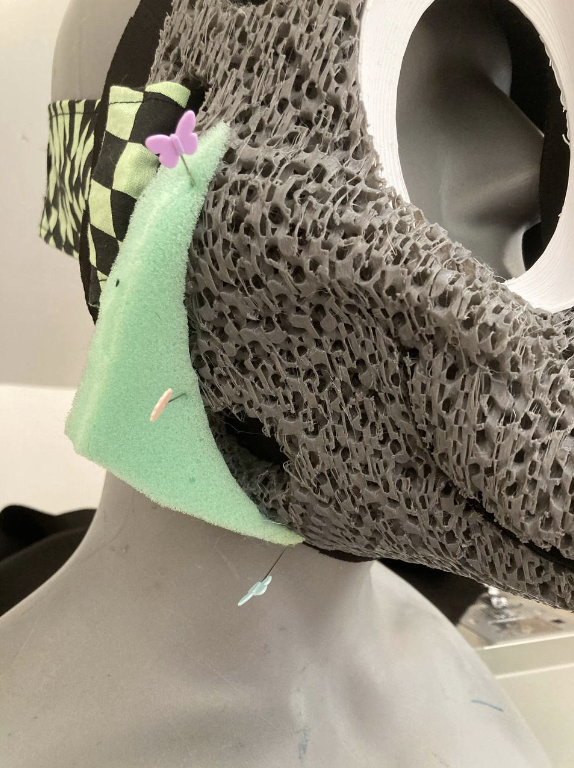
Bevel the edge so it splays outwards. Pin each piece down, double check for symmetry, and glue down.
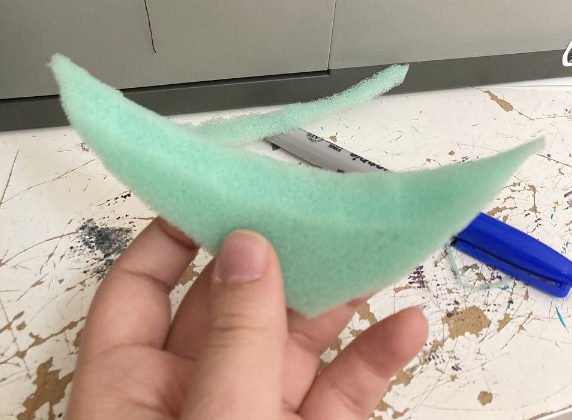
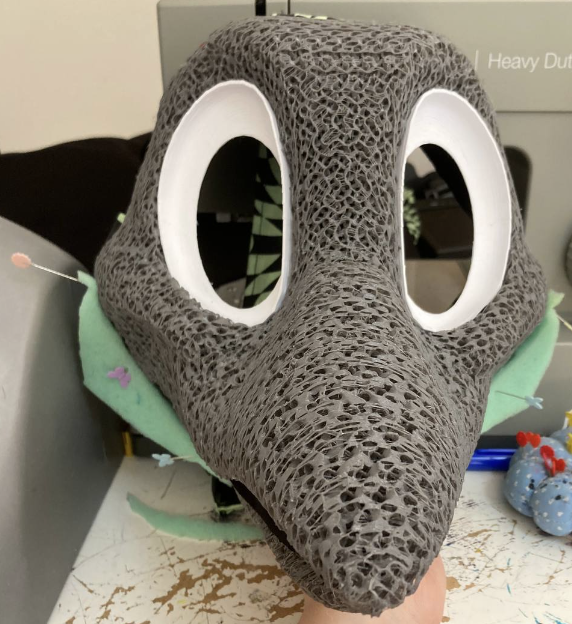
The ears are somewhat similar. Draw an ear shape that curves on the bottom, this allows the ear to sit upright on the head and gives it a more dynamic feel. Your ear may need to extend to a second sheet of paper depending on the size.
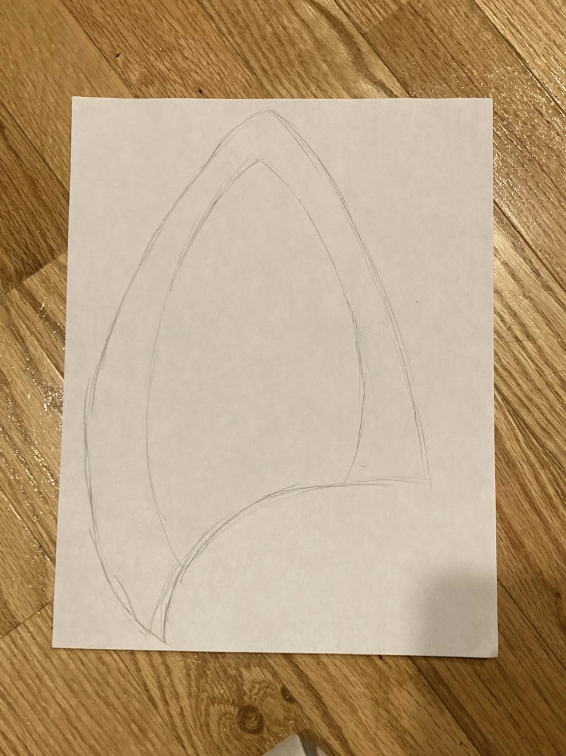
Test the paper pattern on the head. You will want to make sure there is enough space between the inner edge of the ear and the center of the head. If you aren't a fan, either adjust the shape or try again. Getting the curve right can be difficult.
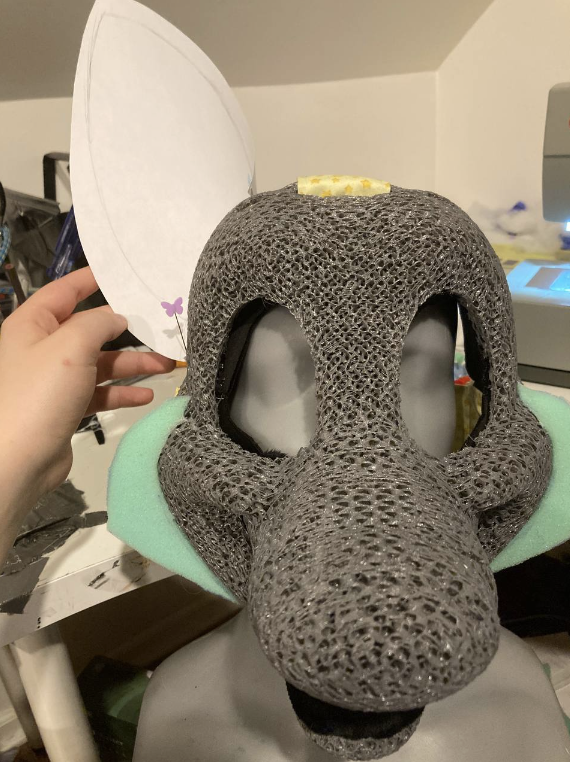
Once you're ready to move forward, trace and cut out two ears onto foam. I used EVA foam here, but you can also use half inch upholstery foam.
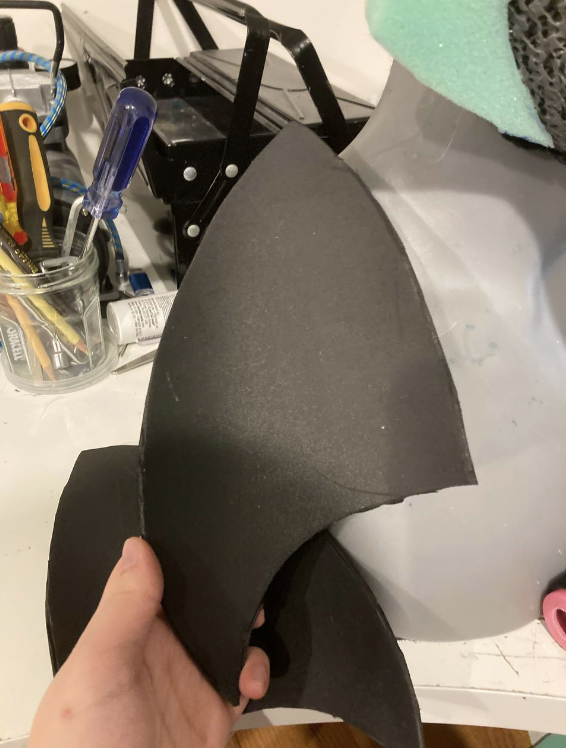
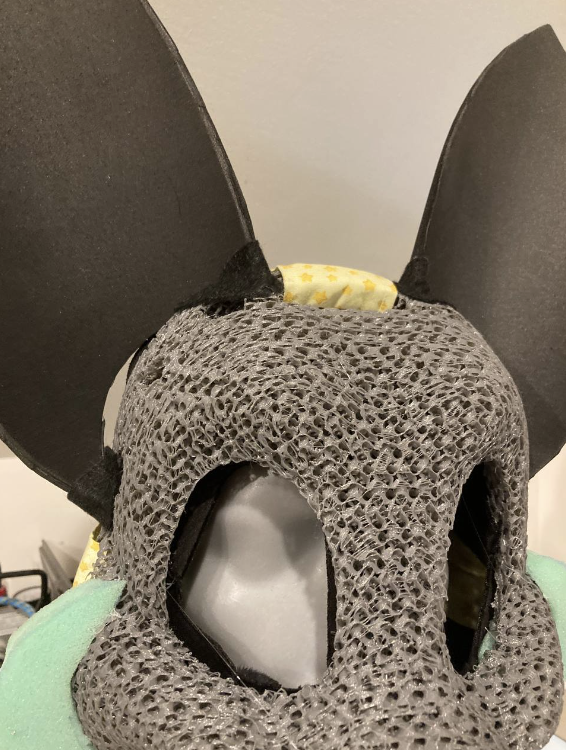
Pin the ears onto the base, double checking for symmetry. I curved them for some depth.
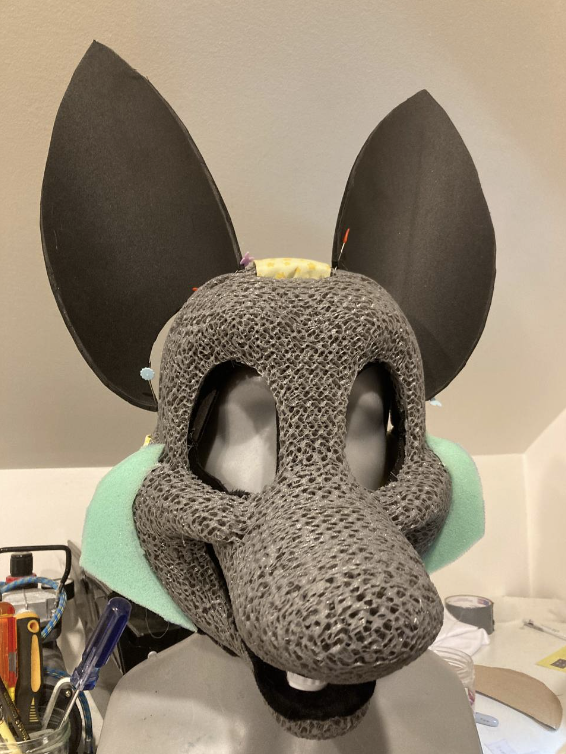
I made the decision to only have the corners of the ears touching the base, leaving a little vent. This is optional.
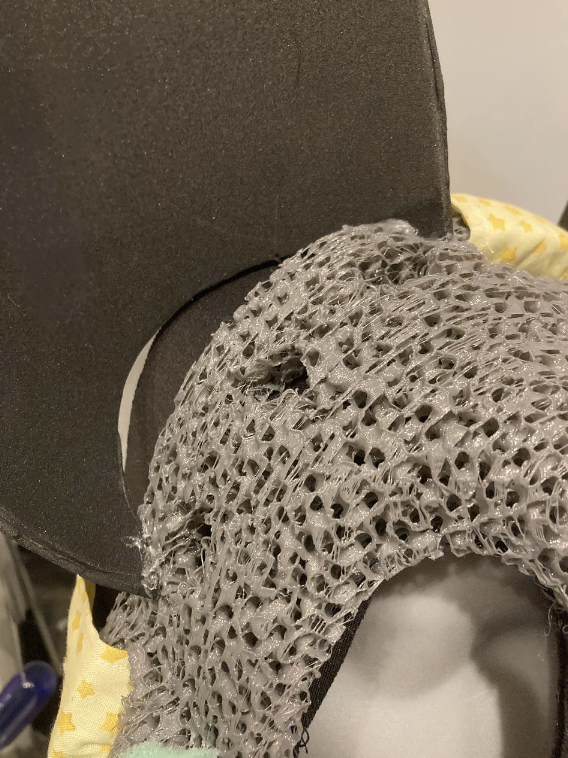
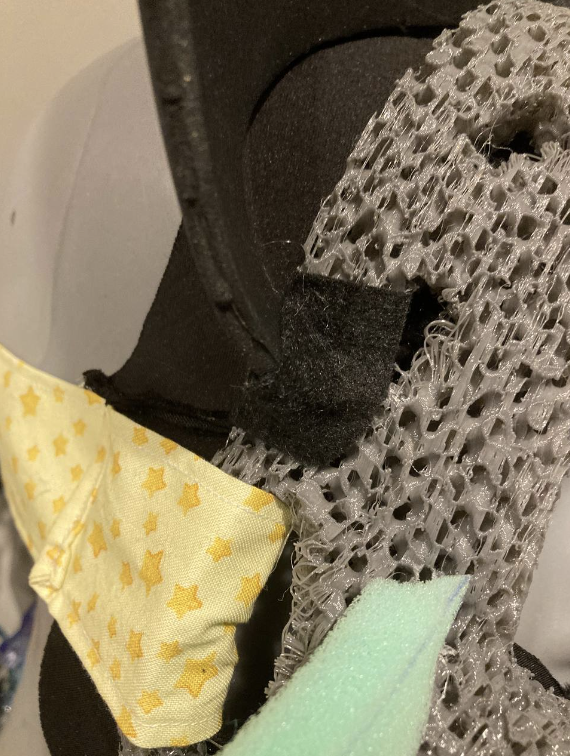
Glue the ears down with hot glue and cut out a strip of felt long enough to cover this edge. Cover the felt in hot glue.
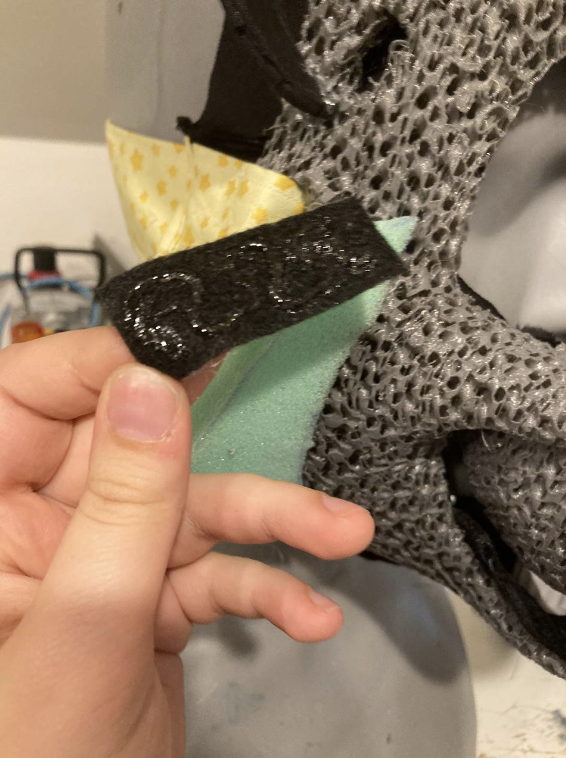
To help reinforce the bond, place this strip atop the glued portion. Technically this can be done for the cheek fluff as well, but the ears are significantly more load-bearing so I only do it on them.
With that done, you have a prepped fursuit base that is ready for fur! Congratulations! Time to move onto the next step: furring the base.
Back to top
